Breathing & Yoga for Headache & Nervous System Comfort
Scientific studies show that some of the most effective ways to reduce headaches are to take deep breaths, engage in calming exercises and yoga postures, and practice yoga breathing exercises for your nervous system comfort.
For many of us, headaches and migraines can be a real pain in the neck. We all know how unpleasant it can be to suffer from constant headaches and migraines, but many of us don't know that there are simple breathing exercises and yoga postures to help alleviate the pain. So if you're looking for a natural way to reduce headaches and migraines and calm your nervous system, try these breathing exercises and yoga postures today!
Warm-Ups:
1. Breaths
For this exercise, use a pillow for support.
Firstly, begin in an upright sitting position with your legs crossed on a pillow. Then, place your hands over your knees and when you’re comfortable, close your eyes. After that, relax your head and bring attention to your breath as you take several deep belly breaths, in through your nose and out through your mouth.

2. Progressive Exercises 1
a. Rubbing Hands Nervous System Comfort
From the Breaths position, engage your core. First, face your hands together, then start rubbing the inner palms vigorously to create heat and when you feel the heat from your hands, bring them over to your face, feeling a gentle heat from both hands. Then, hold this position for several deep belly breaths, in through your nose and out through your mouth. Lastly, relax and return to the starting position. Repeat the movement twice.
 |
 |
 |
b. Pranayama
From the Rubbing Hands position, firstly place the second and third fingers onto your forehead, just above the eyebrows. Then, use your thumb and ring finger to close each side of your nose alternately. Afterward, inhale through your right nostril and exhale through your left nostril; inhale through the left and exhale through the right nostril. Repeat the movement sequence for as long as you need so as a result, try it for 5 seconds on each side.
 |
 |
c. Mindfulness
From the Pranayama position, lower your head. Then, clinch the jaw and the eyes, and bring attention to these movements. Afterward, using the power of the mind, try to relax the muscles in your jaw and eyes to target the pain and attack the source of this pain. Lastly, when you’re ready, open your eyes and gaze down, slowly bringing your head up and forward.
 |
 |
 |
Routines:
1. Progressive Exercises 1: Gomukhasana Variations
a. Shoelace Pose
Begin in an upright sitting position with your legs crossed on the floor. Maintaining good in your upper body, then contract your core. Then, stack your knees and place your thumbs at the center of the soles of your feet, then press lightly. Finally, once you find comfort, take a few deep belly breaths, in through your nose and out through your mouth.

b. Cow Face Pose Eagle Arms Forward Bend
From the Shoelace Pose position, maintain a good alignment with your head, shoulders, and hips. Then, engage your core and cross your arms in front of your body at shoulder height, wrapping at the elbows and wrists. Afterward, bring the arms up, drop your head back, exhale, and slowly hinge through your hips to bend your upper body forward. Lastly, hold this position for a few seconds. Repeat the movement. Start with 1 set of 3 repetitions.
 |
 |
 |
c. Gomukhasana with Self Hug
From the Cow Face Pose Eagle Arms Forward Bend position, release your arms and engage your core. Then, spread your arms to open the chest to your shoulders, then wrap yourself with your arms. Afterward, round the spine and tuck your chin, then slightly bend forward. Lastly, inhale, and open your arms to return to the starting position.
 |
 |
 |
Repeat the Shoelace Pose with your right leg over your left leg. Then, repeat Gomukhasana with Self Hug and Cow Face Pose Eagle Arms Forward Bend.
2. Seated Windshield Wipers
Begin in an upright sitting position on the floor with your knees bent and your feet flat on the floor, wider than shoulder-width apart. Maintain good alignment in your upper body. Plant your hands on the floor behind you for support. Engage your core and rotate to lower your bent knees to one side. Return to the starting position and repeat the movement on the opposite side. Repeat the movement in alternate directions.
 |
 |
3. Child’s Pose
For this exercise, use a pillow, a yoga block, or a bolster for support.
Begin in an upright kneeling position in front of the pillow with your knees wider than shoulder-width apart. Tighten your abdominal area. Shift your hips back to your feet, lower your upper body to the pillow and extend your arms overhead. Lower your forehead to the floor, relaxing your mid-back area for a light stretch. Take several deep belly breaths, in through your nose and out through your mouth. Relax and return to an upright sitting position.
You can do the exercise without support.

Child’s Pose Variation 1 for Nervous System Comfort
At this point, bring both hands towards the back and grab your feet. Take a couple of deep belly breaths, in through your nose and out through your mouth, then apply some pressure on your forehead and rock your forehead side to side. Return to a neutral position and hold the position for a couple of seconds.
 |
 |
 |
4. Progressive Exercises 2:
Yoga Mudrasana 1 for Nervous System Comfort
From Variation 1, place your hands behind your back, interlace your fingers together, and slowly extend your arms towards the ceiling as you press your forehead to the mat. Afterward, hold the position for several deep belly breaths, in through your nose and out through your mouth.
 b. Yoga Mudrasana 2 for Nervous System Comfort
Then, inhale as you lift your hips upwards until you press your top overhead onto the mat. Then gaze up between your legs. Finally, hold the position for several deep belly breaths, in through your nose and out through your mouth.

Repeat Child’s Pose Variation 1 and Child’s Pose
5. Thread the Needle
From the Child’s Pose position, reach one hand toward the sky, then thread it under your body as you lower your arm and upper body to the floor. Afterward, place the opposite arm overhead or on your lower back. Then, hold this position for several deep belly breaths, in through your nose and out through your mouth. Lastly, relax and return to the starting position. Repeat the movement on the opposite side.
 |
 |
 |
Repeat Windshield Wipers.
6. Pashchimottanasana
For this exercise, use a pillow or a strap as a bind.
Begin in an upright sitting position on the floor with your legs extended forward. Engage your core, then hinge through your hips to gently bend your upper body forward. Hold this position for several deep belly breaths, in through your nose and out through your mouth. Relax and return to the starting position.

Variation Exercise
At this point, clasp your fingers behind your neck, then allow the weight of your upper body to pull your head down. Then, hold this position for three deep belly breaths, in through your nose and out through your mouth. Lastly, relax and return to the starting position.

7. Neck Circles
From the Variation Exercise position, slowly return to an upright position with your hands in front of you. Afterward, engage your core, then gently move your head to a counterclockwise circular motion. Lastly, repeat the movement in the opposite direction. Start with 1 set of three repetitions.
 |
 |
 |
 |
8. Butterfly Pose
Begin in an upright sitting position on the floor with your knees bent and feet flat on the floor. Then, bring the soles of your feet together and straighten your spine. Afterward, tighten your core and open your knees out to the sides. Grab your toes with both hands and keep your head pointing towards the front, then slowly tuck your chin towards your chest. Lastly, hold this position for three deep belly breaths, in through your nose and out through your mouth. Relax and return to the starting position.
 |
 |
9. Lying Breaths for Nervous System Comfort
Firstly, lie on your back with your knees bent and feet flat on the floor, wider than shoulder-width apart. Then, tuck your tailbone and place one hand on your chest and the opposite over your belly. Afterward, shift your heels to point your toes inward and let your knees fall inward. Lastly, hold this position for five deep belly breaths, in through your nose and out through your mouth. Relax and return to the starting position.

Cool Downs:
1. Corpse Pose
For this exercise, use an eye mask or any cloth to cover your eyes to help calm the nervous system.
First, lie on your back on the floor, maintaining good alignment of your head, shoulders, hips, and legs. Then, extend your arms out at your sides. Afterward, close your eyes or cover your eyes with an eye mask and relax your body, then visualize you are being released from an illness or pain. Lastly, hold the position for several deep belly breaths, in through your nose and out through your mouth, relaxing your upper body.
To intensify the stretch, wiggle your toes and rock the head from side to side.

2. Full Body Stretch
Lie on your back on the floor, maintaining good alignment with your head, shoulders, hips, and legs. Place a pillow at the back of your hips. Engage your core and bring your arms overhead as you stretch your legs. Hold this position for several deep belly breaths, in through your nose and out through your mouth.

3. Knees to Chest
At this point, bring both knees to your chest, then wrap your hands around your knees. Engage your core and curl your body as you lift your head towards your knees. Hold the position for several deep belly breaths, in through your nose and out through your mouth.
 |
 |
4. Side Fetal Pose
Lie on the floor with your knees bent, maintaining good alignment in your upper body. Extend your bottom arm overhead and rest your head on your outstretched arm. Keeping your feet together, close your eyes. Hold this position for several deep belly breaths, in through your nose and out through your mouth.

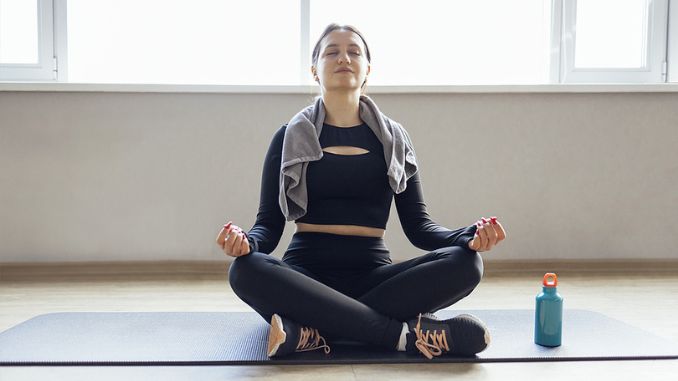
5. Lotus/Prayer Pose
Begin in an upright sitting position on the floor with your legs crossed in front of your body. Maintain a good alignment of your head, shoulders, and hips. Place your hands together at the center of your heart and close your eyes. Hold this position for several deep belly breaths, in through your nose and out through your mouth.

By targeting specific breathing techniques and postures, we can help reduce headaches and migraines and calm our nervous system. By taking the time to do these exercises and postures, we can help ourselves relax and eliminate the pain and tension that can come with a headache.
It’s important to note that while these exercises may help reduce your chances of getting headaches and migraines, they are not a replacement for medication.
