Limber Legs: Embrace The Essence Of Leg Day Through Yoga
Stretching single leg yoga poses on leg day through yoga poses is essential for various reasons. To begin with single leg yoga poses, it improves your flexibility and range of motion, giving your muscles more breathing room. This means you can squat deeper, lunge lower, and kick higher without fear of snapping in half.
But it's not only about displaying flexibility. Stretching also improves muscle circulation, allowing more oxygen and nutrients to reach the muscles. This can aid in muscle rehabilitation and alleviate post-leg-day discomfort. Consider it a way to reward your hard-working muscles.
Anatomy Of The Legs And How Single Leg Yoga Poses Targets Different Muscle Groups
-
Quadriceps (Front Thigh Muscles)
Yoga poses like Warrior I and Warrior II engage your quads big time. These poses require you to bend your knees and hold, giving those front thigh muscles a solid workout.
-
Hamstrings (Back Thigh Muscles)
Ever reached for your toes in a forward bend? That’s your hamstrings getting stretched in poses like Uttanasana. Yoga encourages lengthening and flexibility in leg muscles.
-
Hip Flexors
Lunges and Pigeon Pose are hip flexor heaven. By opening up the hips, yoga helps alleviate tightness in these muscles, promoting flexibility and range of motion.
-
Adductors (Inner Thigh Muscles)
Poses like Butterfly or Wide-legged Forward Bend target the inner thighs. These stretches contribute to improved flexibility in the adductor muscles.
-
Glutes
Bridge Pose and Chair Pose are gluteal gold mines. By engaging and holding these poses, you are strengthening and toning those crucial muscles in your buttocks.
-
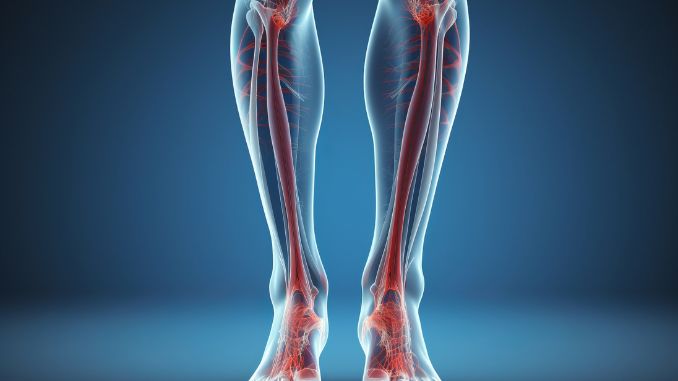
Calf Muscles
Standing yoga poses like Tree Pose, mountain pose and balancing poses activate the calf muscles, enhancing strength and stability.
-
Ankles and feet
Yoga doesn’t forget the foundation. Standing poses and movements like toe stretches help improve flexibility and strength in your ankles and feet.
Try these 7 Single Leg Yoga Poses for Improved Flexibility
It's highly recommended to begin with a warm-up session before diving into your yoga practice. Starting with gentle stretches, breathing exercises, or even a short walk can significantly prepare your body and mind.
This initial step increases blood circulation, enhances flexibility, and reduces the risk of injury by loosening the muscles and joints. Furthermore, a warm-up helps to mentally transition into a state of mindfulness and concentration, setting the stage for a more effective and enriching yoga experience.
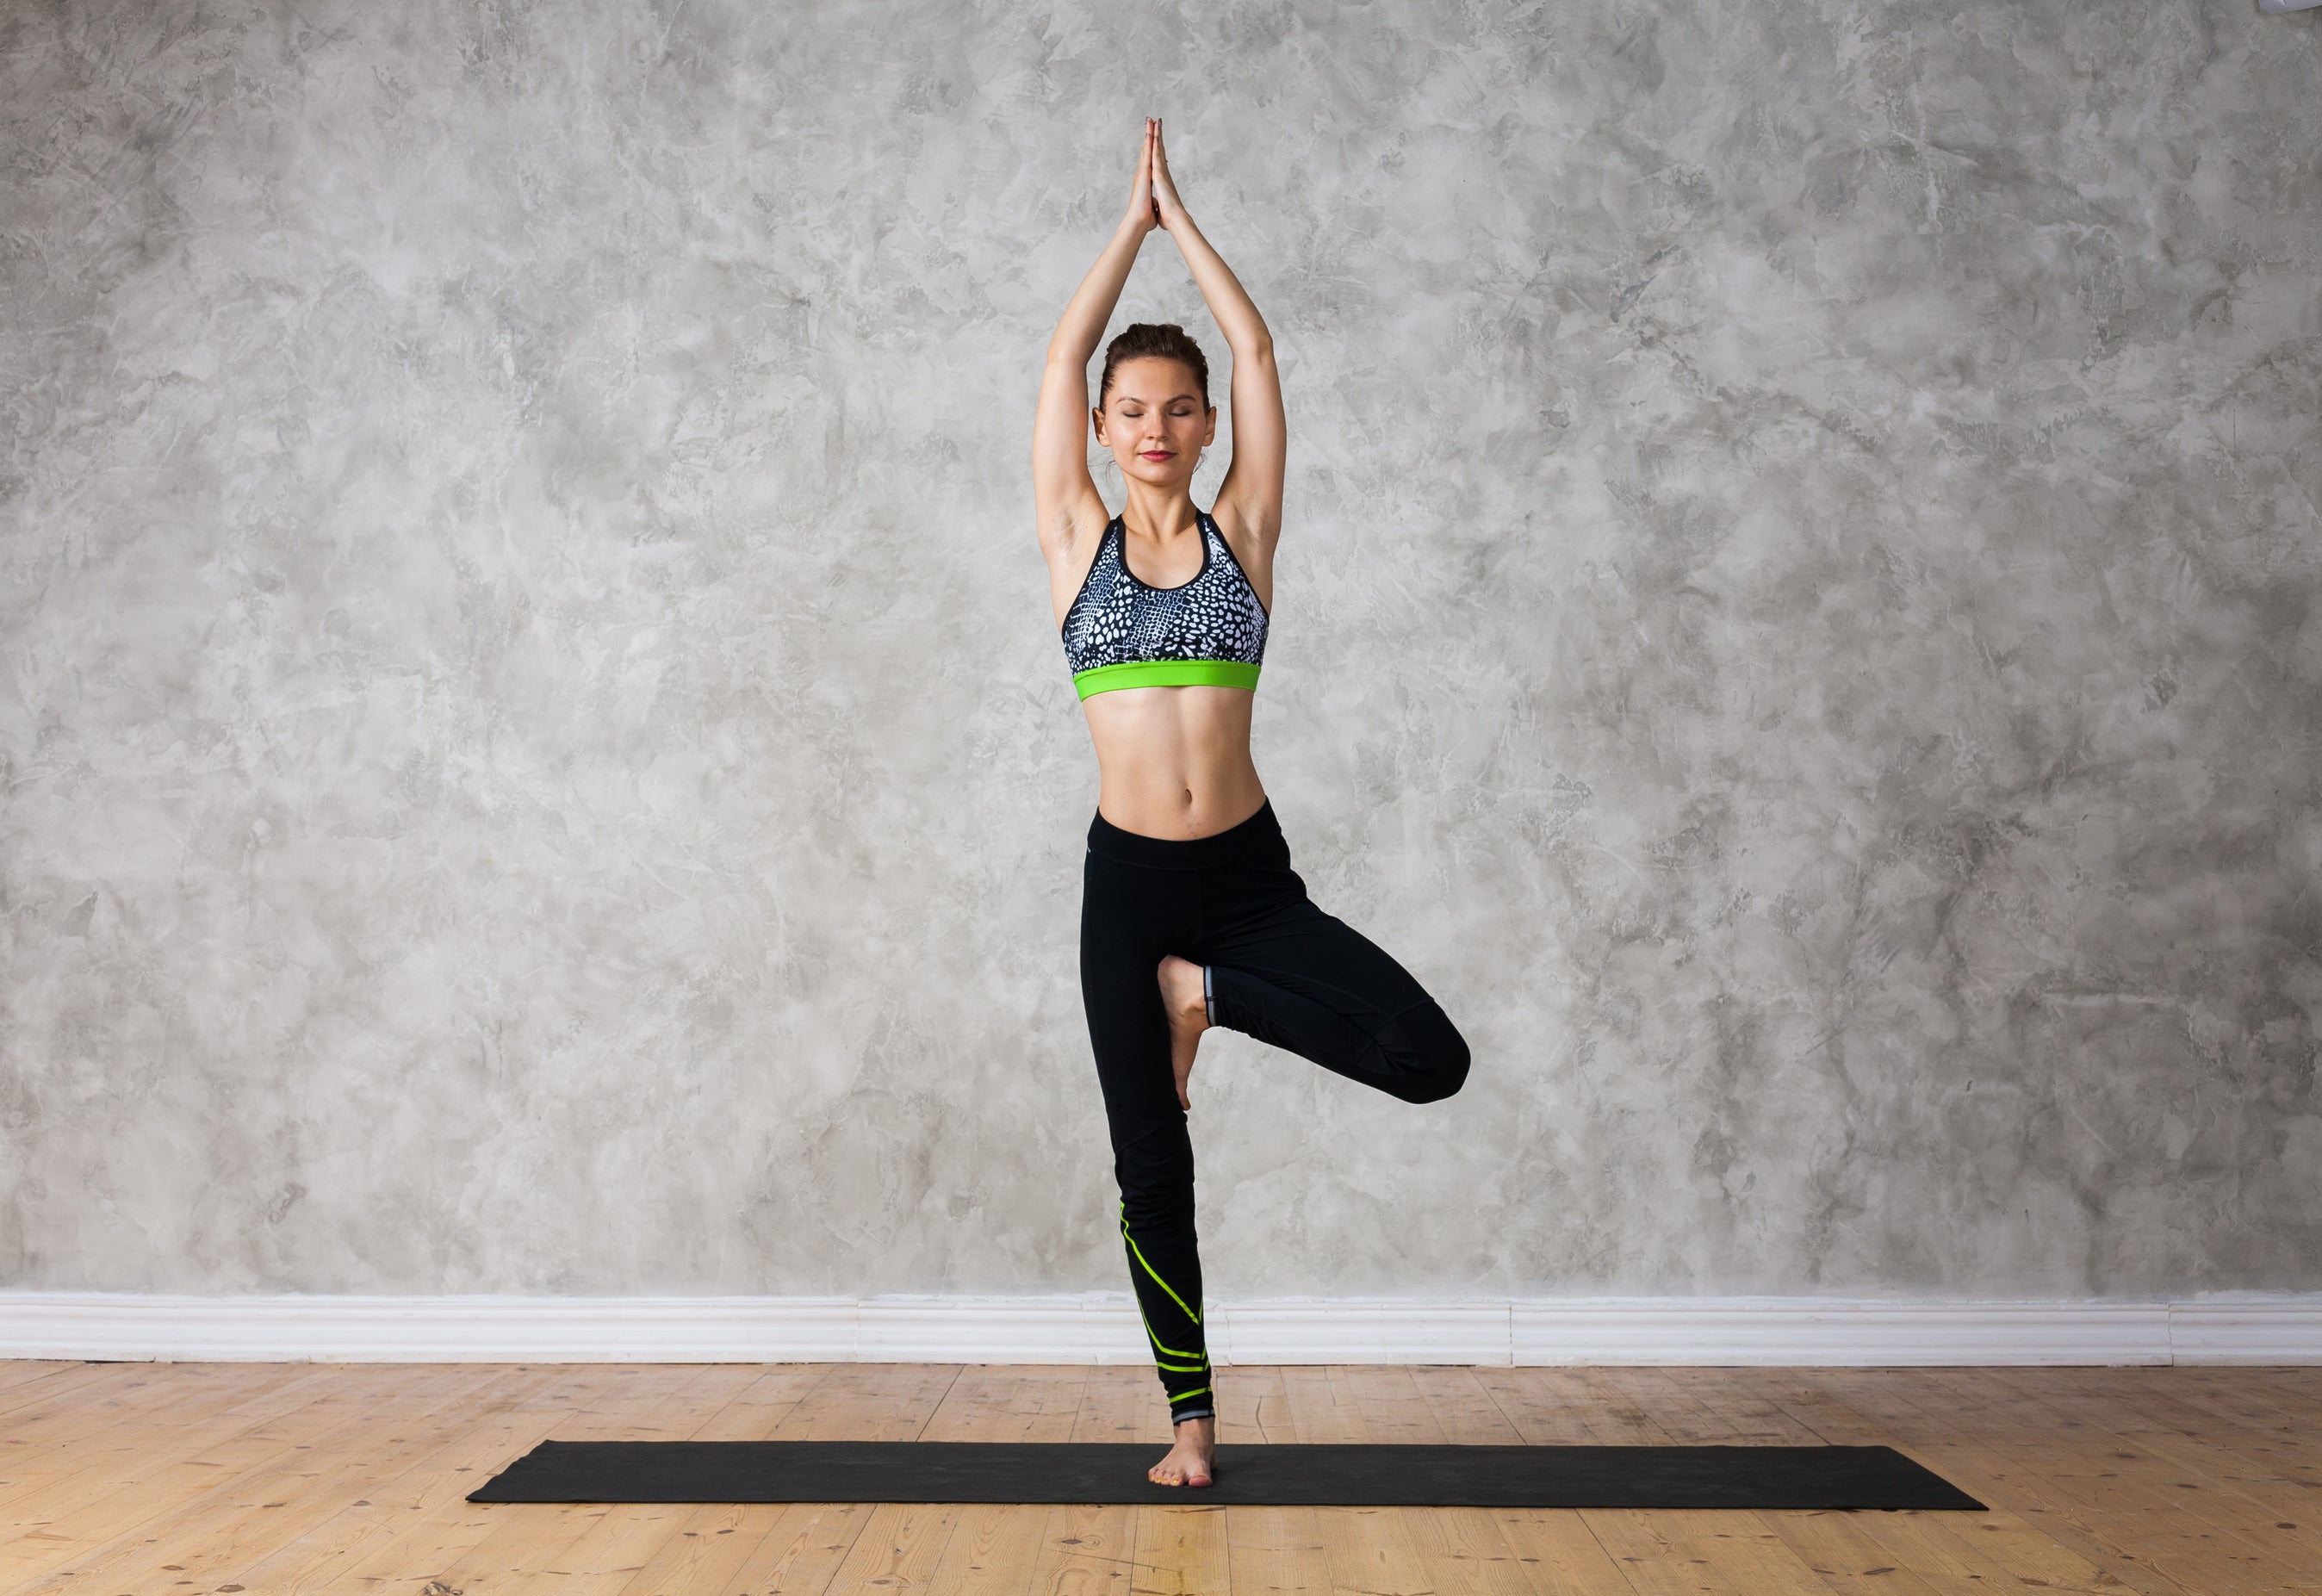
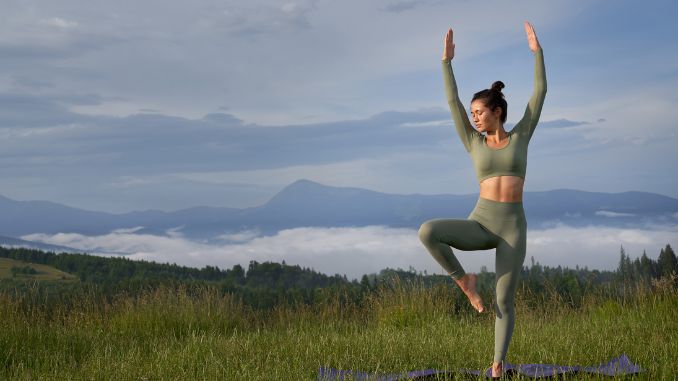
1. Tree Pose (Vrikshasana)
For this exercise, stand by the wall or place one hand on the wall for balance if needed.
Firstly, Begin Single Leg Yoga Poses in an upright standing position with your feet hip-width apart, maintaining good alignment with your head, shoulders, hips, and legs. Extend both arms overhead with your palms pressed together. Secondly,keep your gaze focused on an unmoving point or object in front of you. Thirdly, engage your core and shift your weight onto one foot. Afterwards, bend your other leg, rotate your knee outward, and rest your left foot alongside your supporting leg, either above or below the knee. Lastly, hold this position for a couple of deep belly breaths, in through your nose and out through your mouth. Relax and return to the starting position. Repeat the movement on the opposite side.
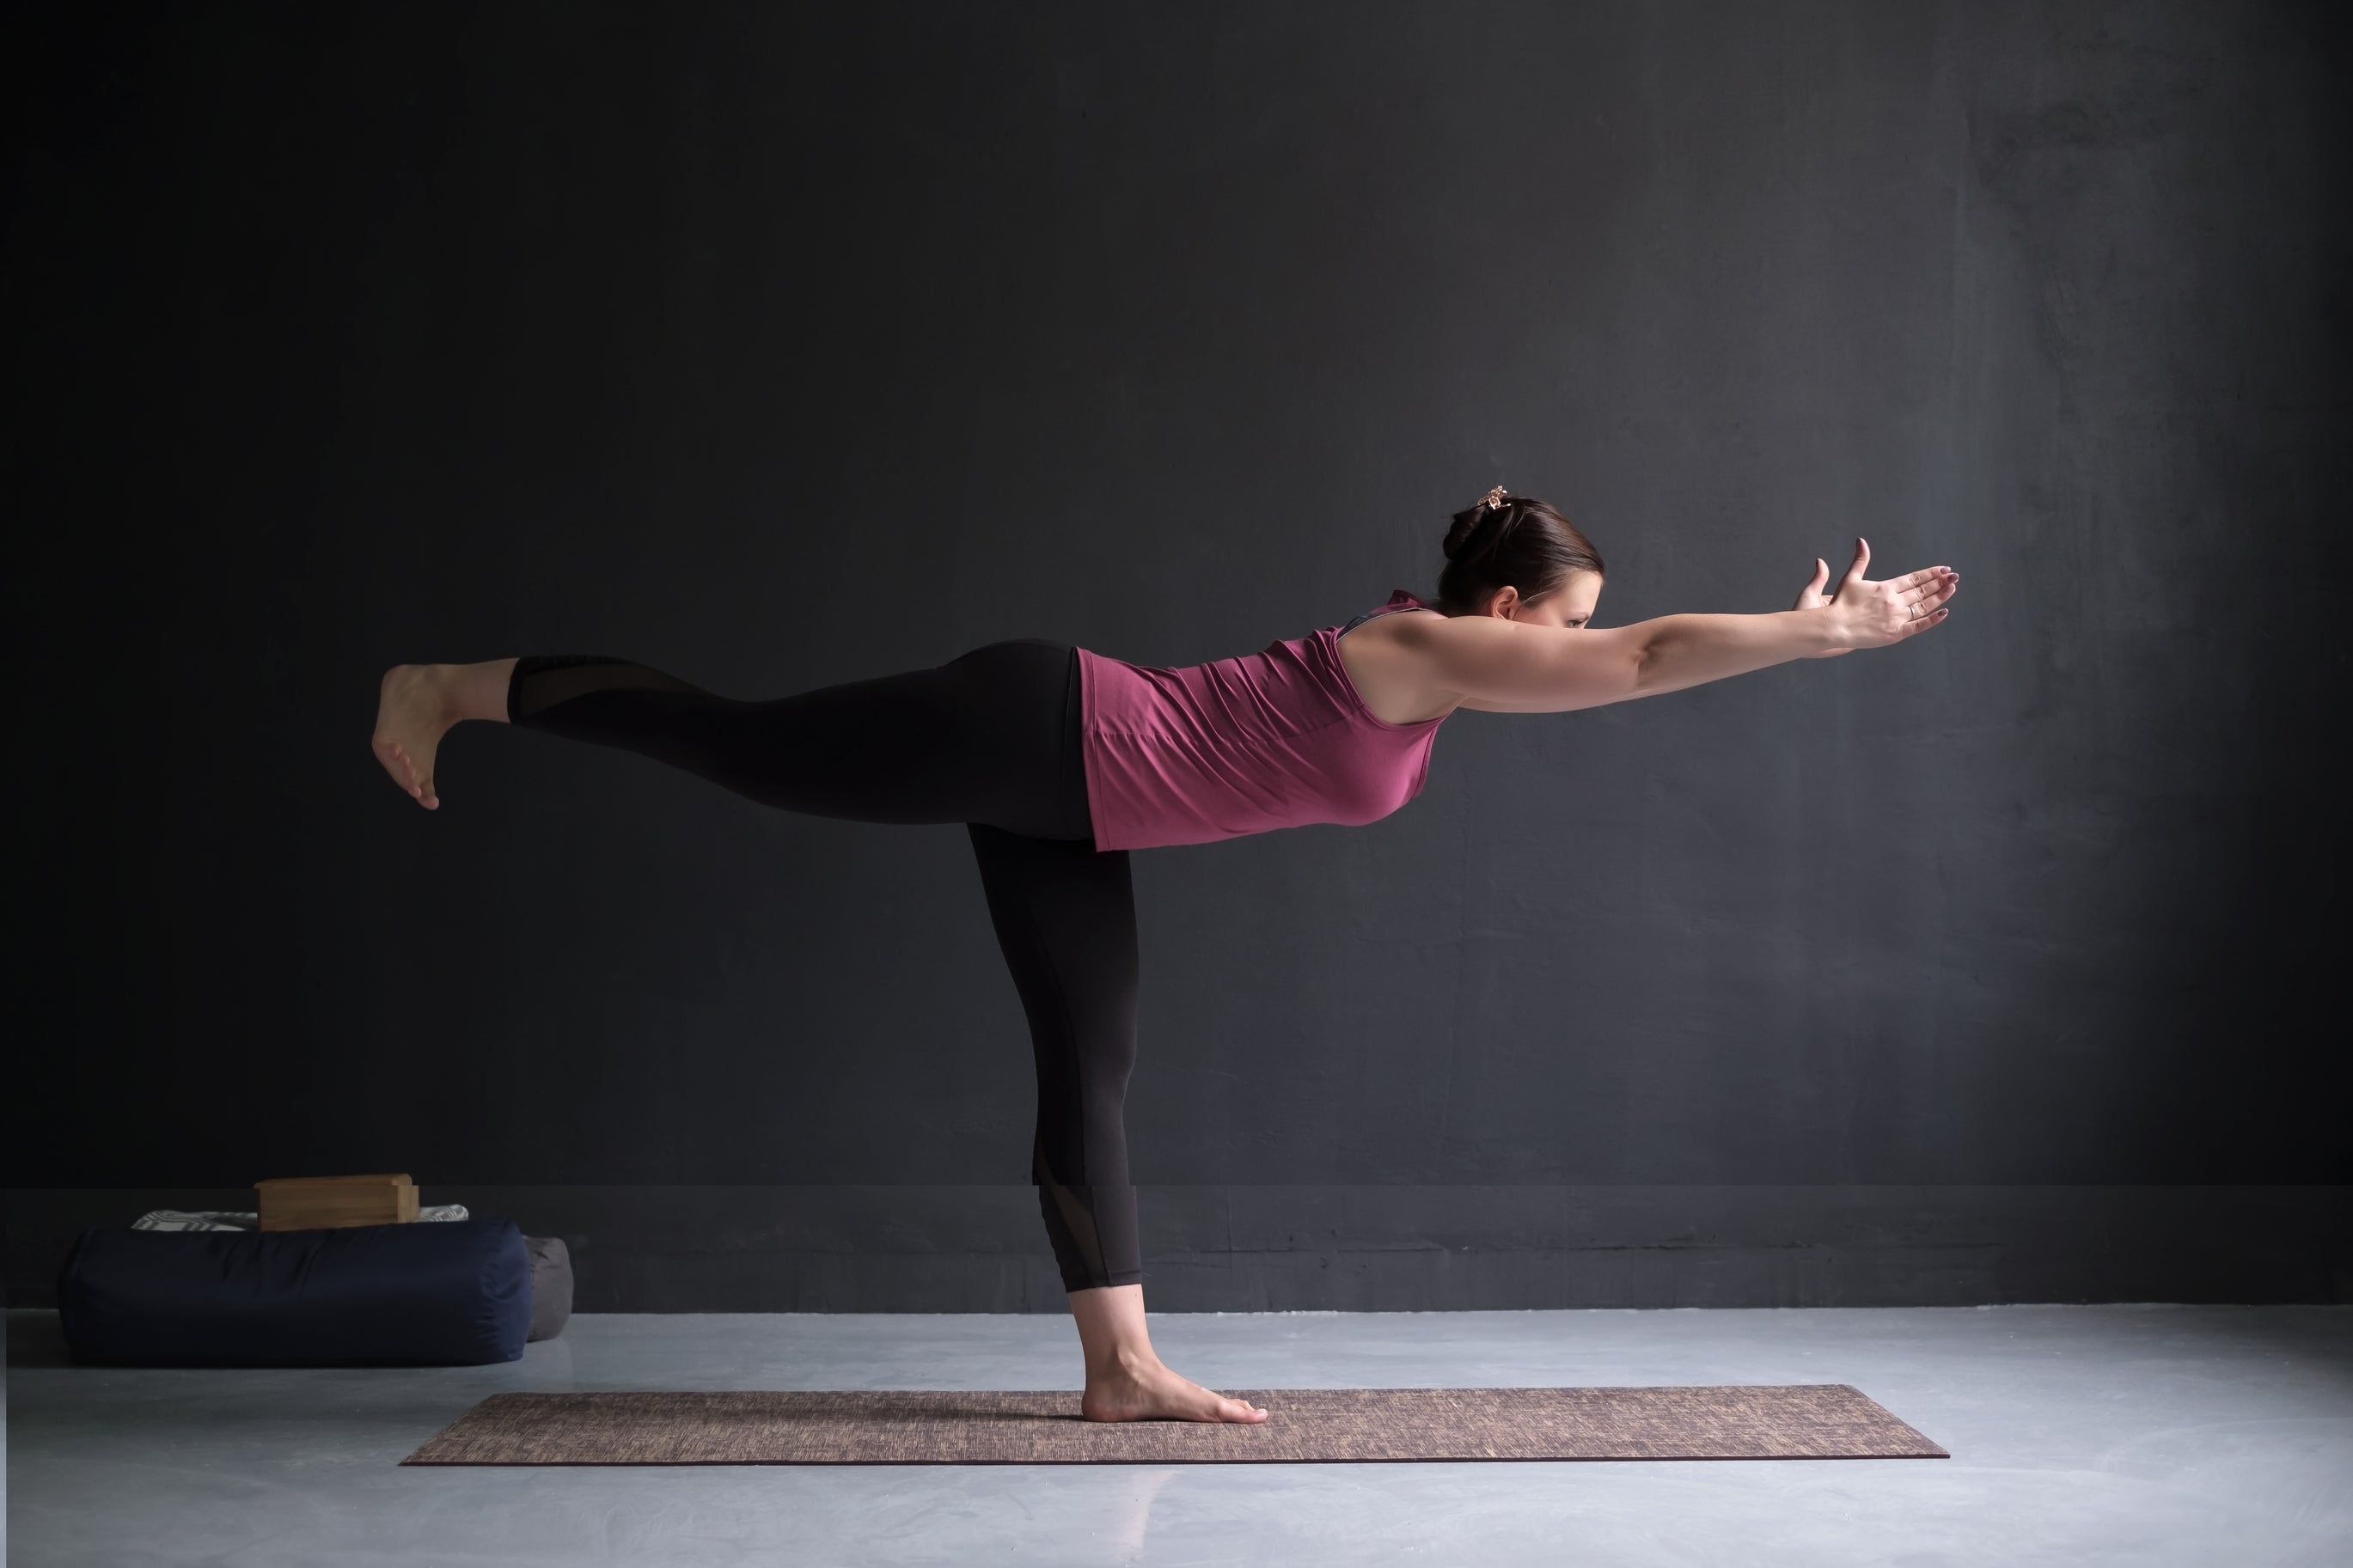
2. Warrior III (Virabhadrasana III)
Firstly, begin single leg yoga poses in an upright standing position with your arms extended overhead, maintaining good alignment with your head, shoulders, hips, and legs. Secondly, engage your core and transfer all of your weight onto your left foot. Thirdly, slightly bend your supporting knee and hinge your hips, bending forward until your upper body is parallel to the floor while extending your right leg back. Afterwards, make sure your hips are square to the floor and hold this position for a couple of deep belly breaths, in through your nose and out through your mouth. Lastly straighten back up to return to the starting position. Repeat the movement on the opposite leg.
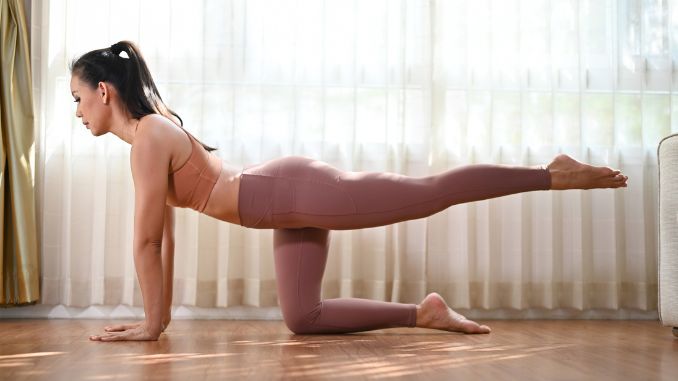
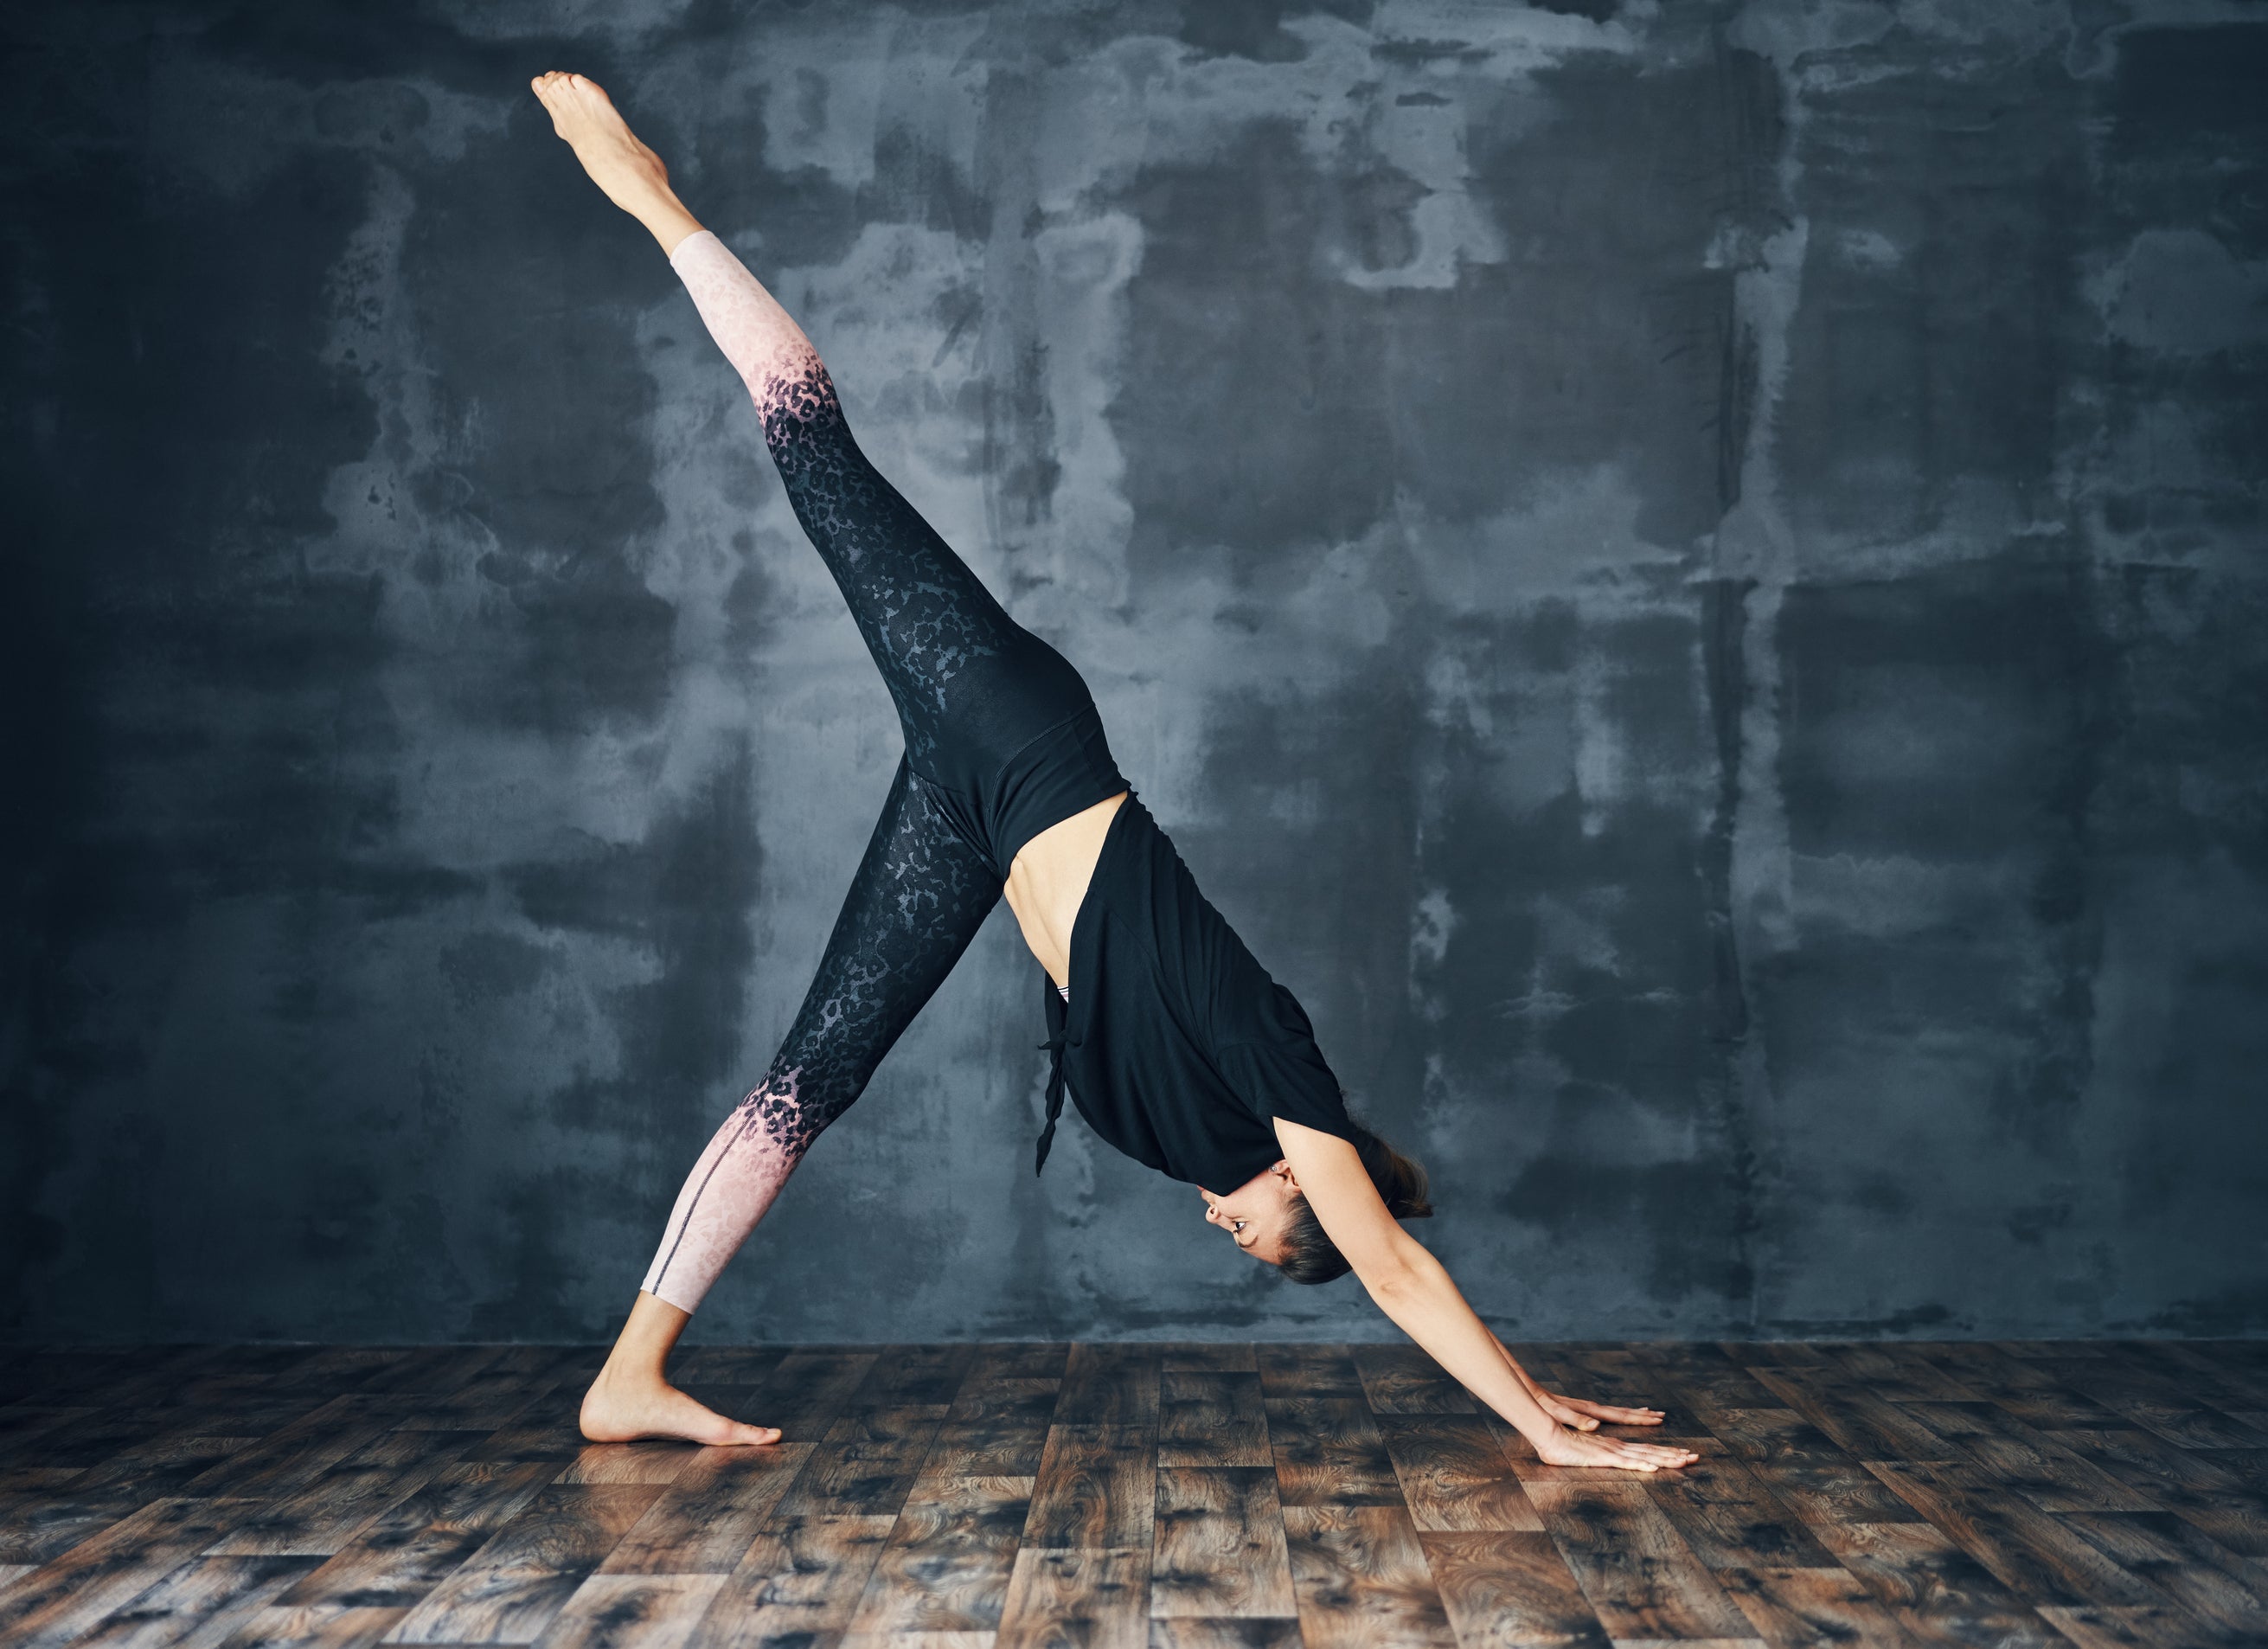
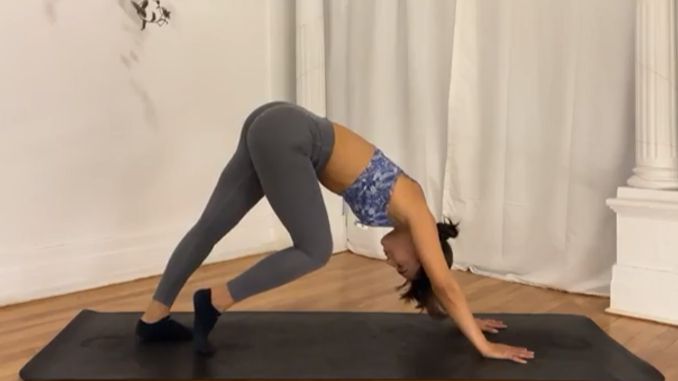
3. Three-Legged Downward Dog (Eka Pada Adho Mukha Svanasana)
Firstly, move into a 4-point position with your knees beneath your hips and your hands under your shoulders. Secondly, tighten your abdominal muscles and push back with your arms, straightening your legs as you lift your hips. Extend one leg towards the ceiling, keeping your hips and shoulders pointing forward to square your hips. Afterwards, lower your forehead towards the floor while keeping your gaze towards the back. Hold this position for several deep belly breaths, in through your nose, out through your mouth. Lastly, relax and return to an upright standing position. Repeat the movement on the opposite side.
4. Half Moon Pose (Ardha Chandrasana)
From the Three-Legged Downward Dog position, lower your extended leg to step between your hands. Engage your core and walk your right hand about a foot forward. Straighten your right leg and rotate your upper body to the opposite side. Extend your other arm up towards the ceiling as you lift your other leg, ideally to be parallel to the floor. Hold this position for several deep belly breaths, in through your nose and then out through your mouth. Relax and return to the starting position. Repeat the sequence of movements on the opposite side.
To make the routine easier, place your hand on top of a yoga block, books, or anything elevated for support.

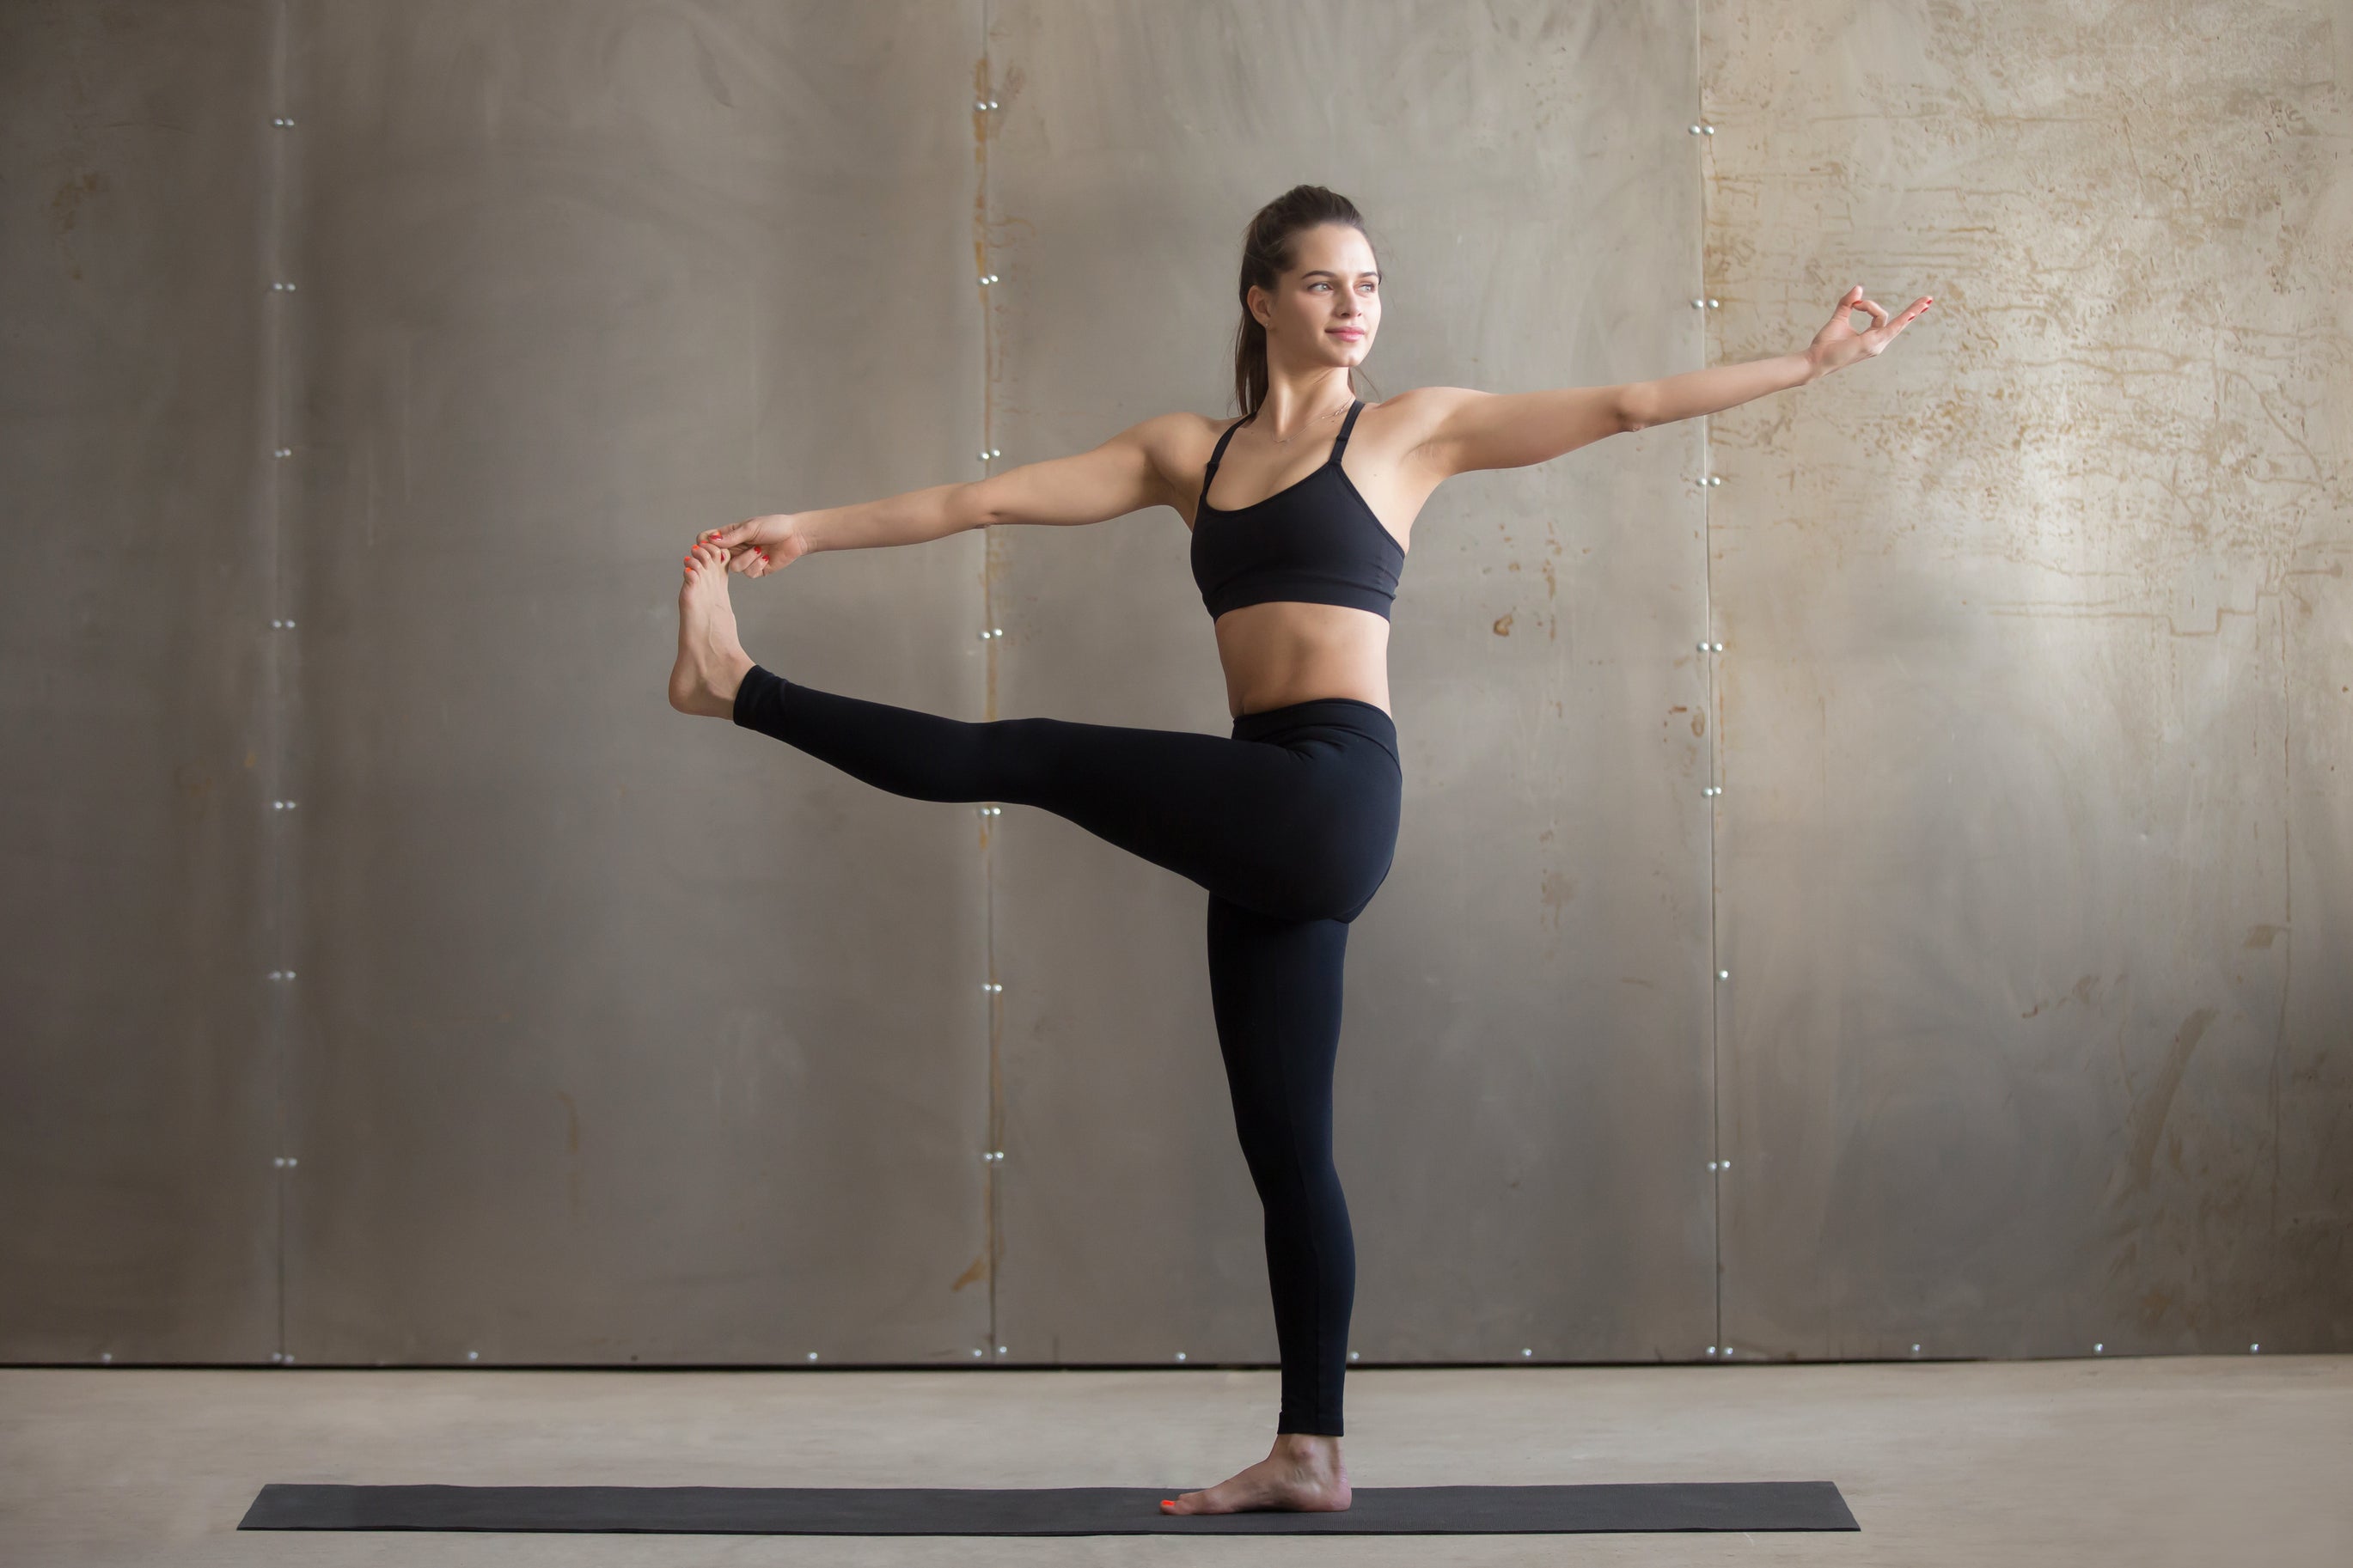
5. Extended Hand-to-Big-Toe Pose (Utthita Hasta Padangusthasana)
Firstly, begin single leg yoga poses in an upright standing position with your feet hip-width apart, maintaining good alignment with your head, shoulders, hips, and legs. Secondly, Engage your core and lift one leg in front of your body, ideally to be parallel to the floor. Thirdly, hold your big toe with your opposite hand as you rotate your upper body to the side. Afterwards, keep your lifted leg straight as you extend your other arm out to shoulder height. Fourthly, hold this position for several deep belly breaths, in through your nose and then out through your mouth. Lastly, relax and return to the starting position. Repeat the movement on your opposite leg.
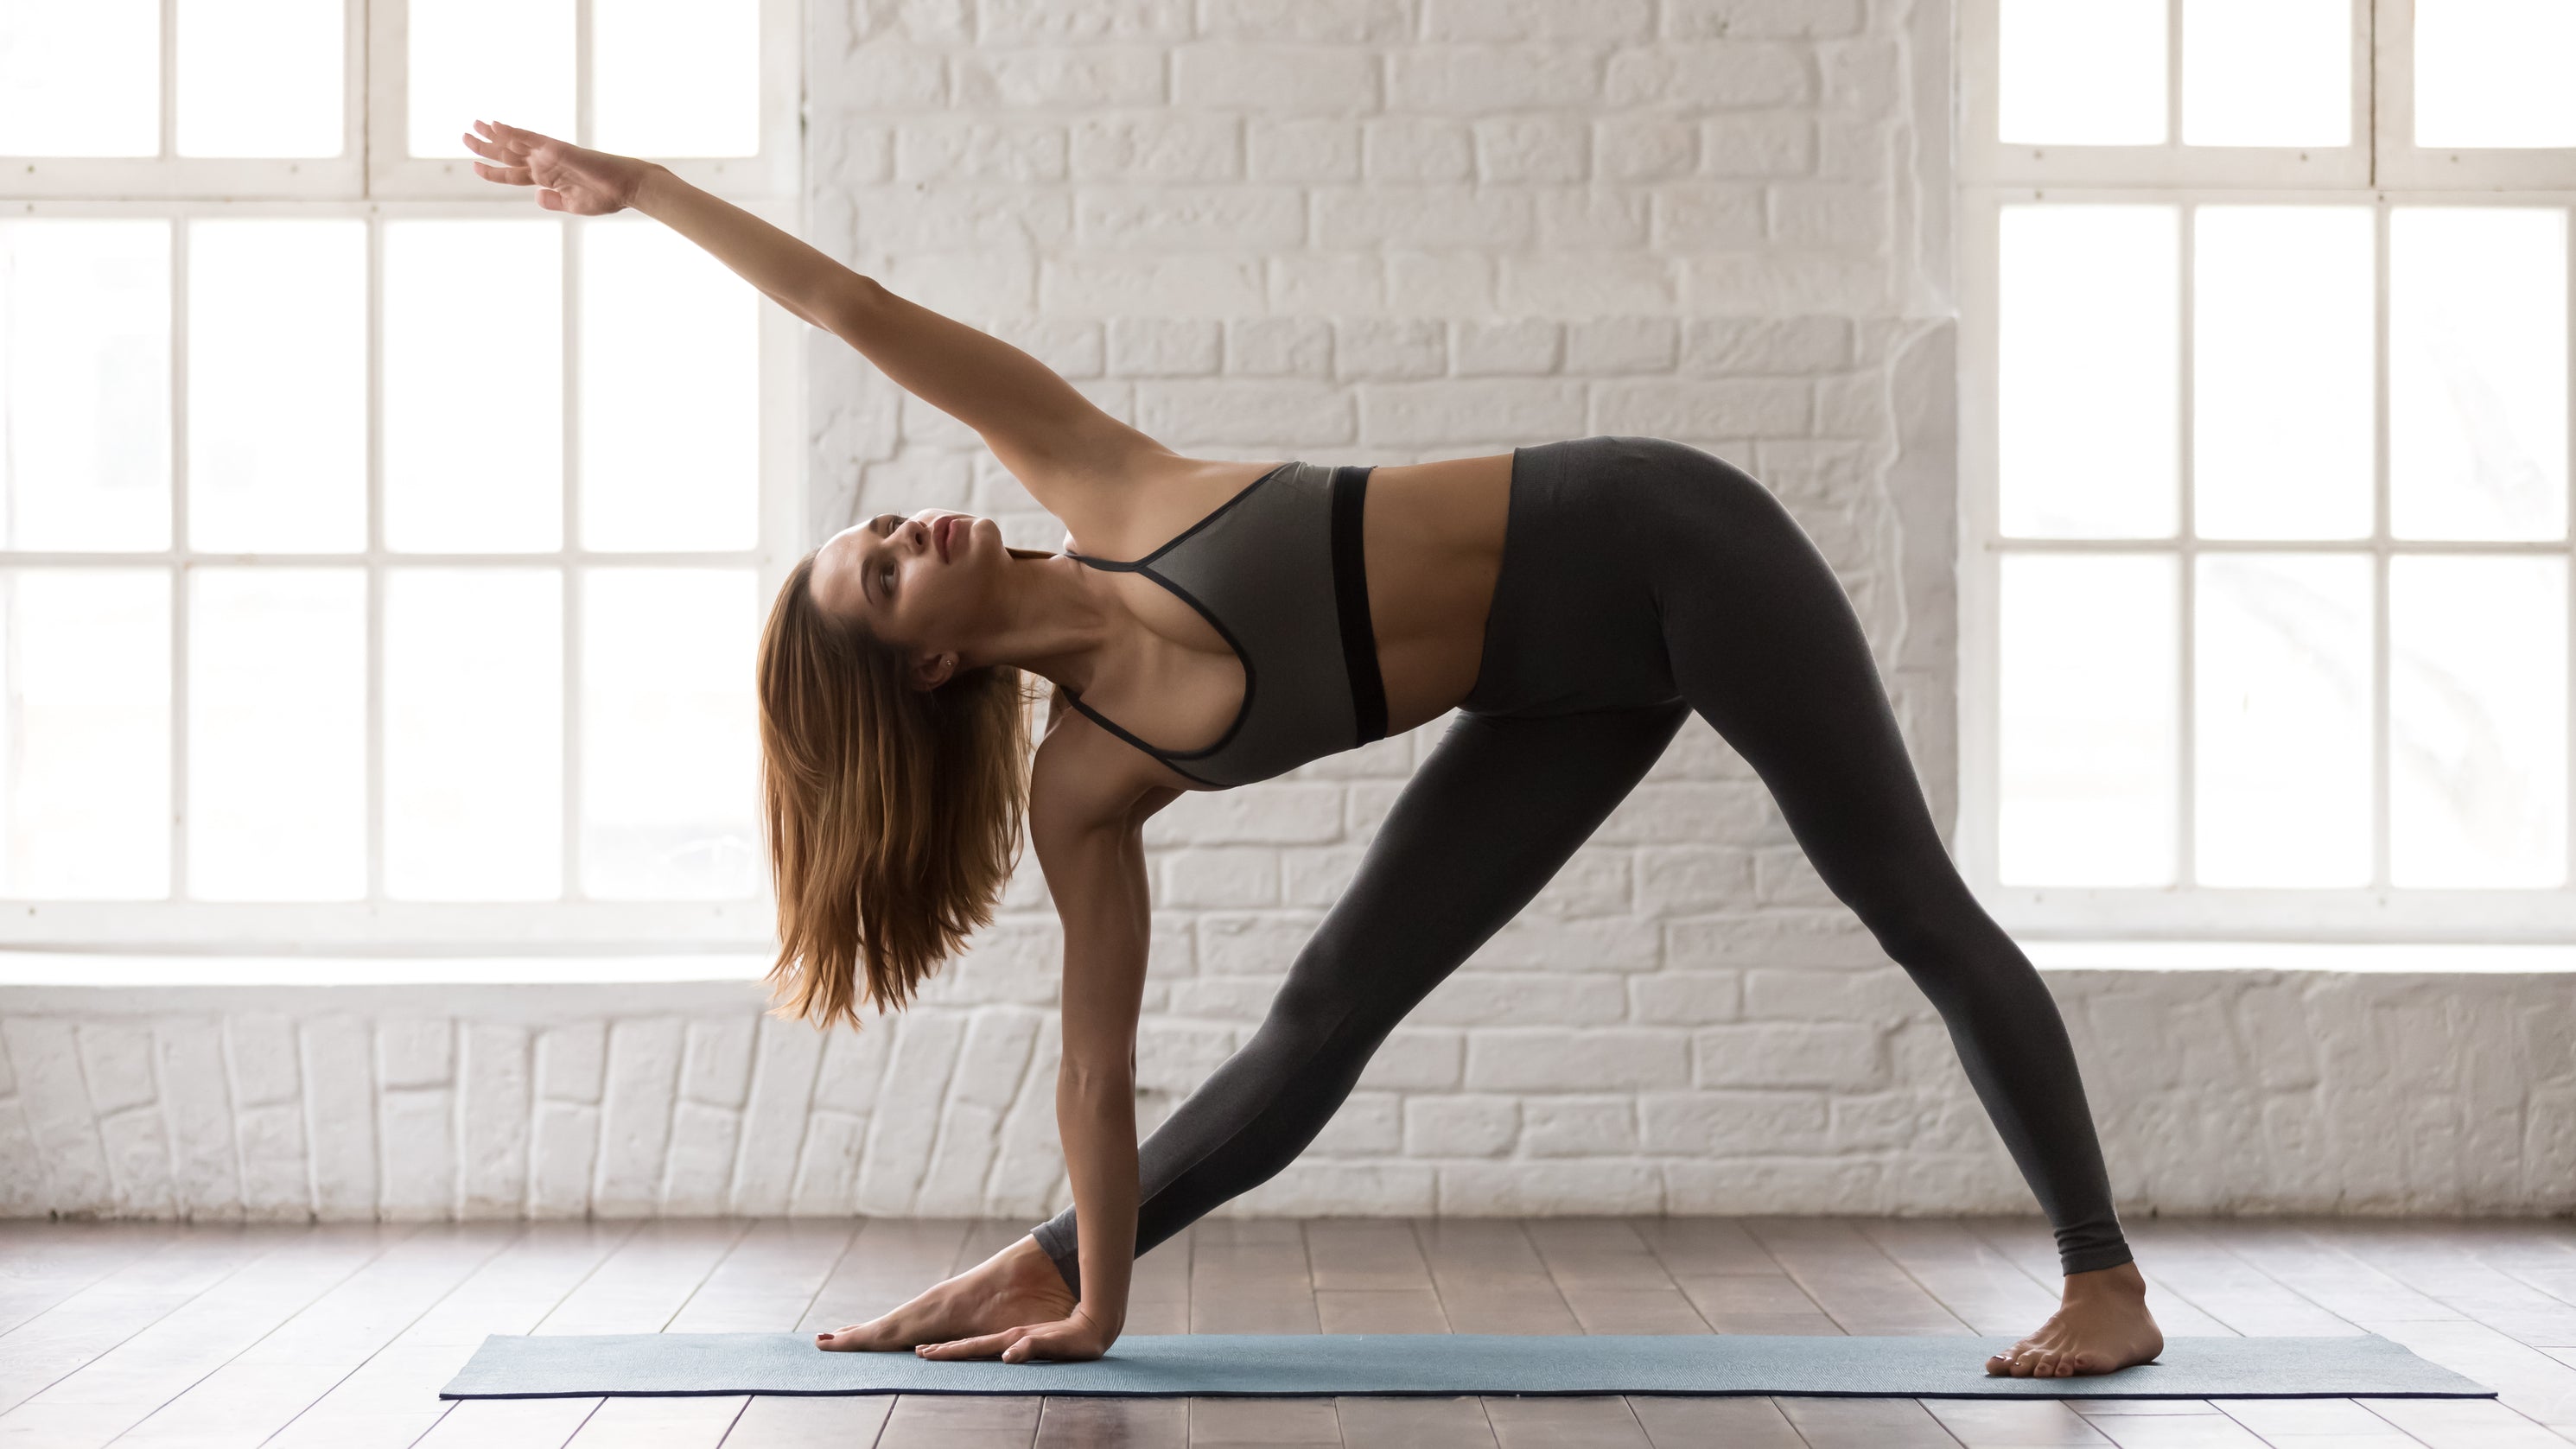
6. Triangle Pose (Utthita Trikonasana)
Firstly, begin single leg yoga poses in an upright standing position with your feet considerably wider than shoulder-width apart, maintaining good alignment in your upper body. Pivot one foot so that your toes are pointing out to the side. Secondly, bend your upper body over your pivoted foot and plant your hand on the outside of your foot for support. Thirdly, contract your core and rotate your upper body to the side as you reach upward with your opposite arm. Afterwards, hold this position for several deep belly breaths, in through your nose and out through your mouth. Lastly, return to the starting position and repeat the movement on the opposite side.
7. Single Knee to Chest
For this exercise, stand by the wall or place one hand on the wall for balance.
Firstly, begin single leg yoga poses in an upright standing position with your feet hip-width apart, maintaining good alignment with your head, shoulders, hips, and legs. Secondly, keep your gaze focused on an unmoving point or object in front of you. Thirdly, engage your core and shift your weight on your left foot as you bend your right knee, pulling it towards your chest using your hands. Afterwards, hold this position for several deep belly breaths, in through your nose and out through your mouth. Lastly, relax and return to the starting position. Repeat the movement on the opposite side.
To intensify the movement, flex or point your lifted foot towards the floor.

Bend It Like Asana: Mastering Other 5 Single Leg Yoga Stretches for Flexibility
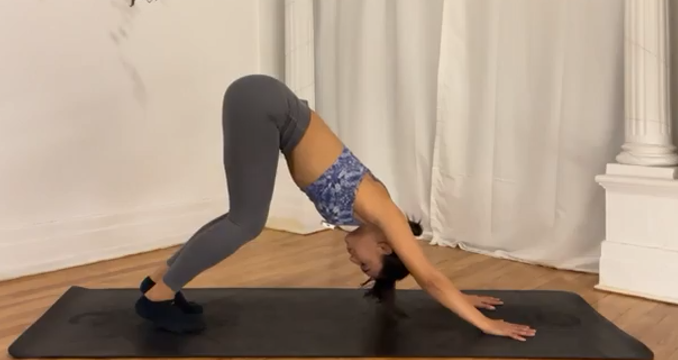
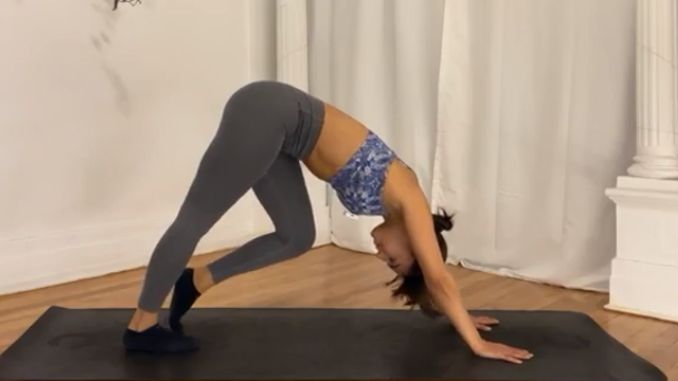
1. Downward-Facing Dog with Knees Bent
Firstly, begin single leg yoga poses in a 4-point position with your hands below your shoulders and your knees beneath your hips. Secondly, tighten your abdominal muscles, push back with your arms, and lengthen your back as you lift your hips. Thirdly, engage your core and bend both knees, stacking your heels over your toes. Afterwards, hold this position for several deep belly breaths, in through your nose and out through your mouth. Lastly, return to the starting position and repeat the movement as needed.
To make the movement more challenging, gently shake your head from side to side or nod your head forward and back.
- Variation 1– Downward- Facing Dog to Walk the Dog
Firstly, begin single leg yoga poses in a 4-point position with your hands below your shoulders and your knees beneath your hips. Secondly, tighten your abdominal muscles, push back with your arms, and lengthen your back as you lift your hips. Thirdly, slowly lower one heel at a time, similar to a walking movement. L.astly, repeat the movement, alternating sides.
|
 |
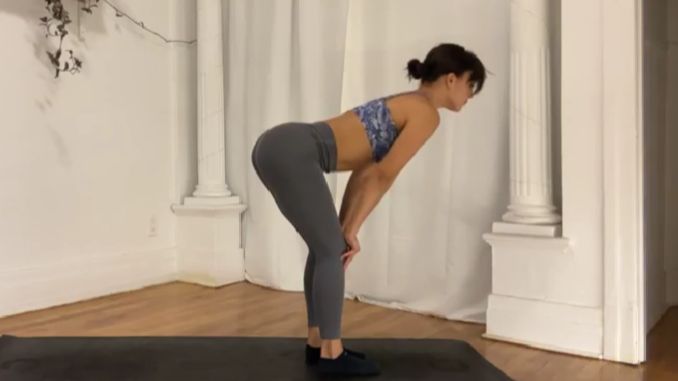
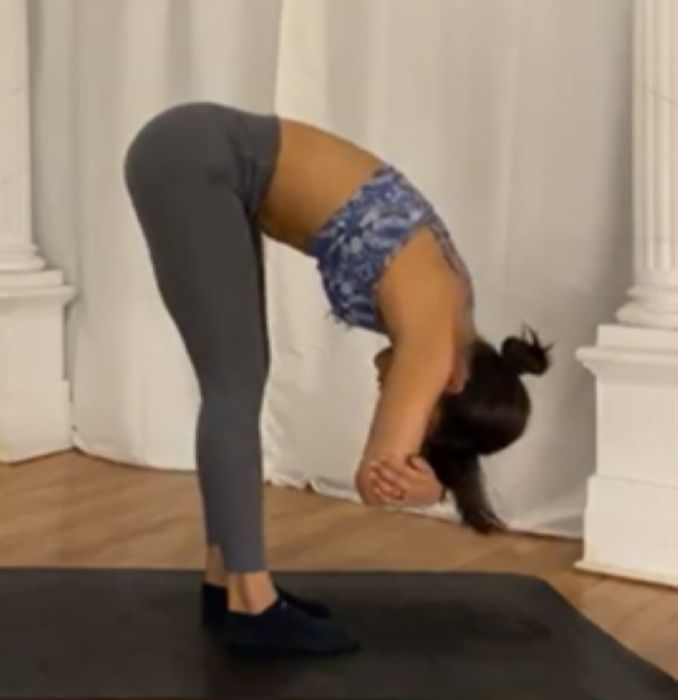
2. Forward Fold to Halfway Lifts
Firstly, begin Single Leg Yoga Poses in an upright standing position, maintaining good alignment with your head, shoulders, hips, and legs. Secondly, engage your core and hinge through your hips to bend your upper body forward. Thirdly, slowly lower your head and arms to the floor while keeping your knees soft. Aferwards, inhale and raise your upper body, ideally to be parallel to the floor. Fourthly, place your hands just below your knees, keeping your legs straight. Lastly, take deep belly breaths, in through your nose and out through your mouth.

|
 |
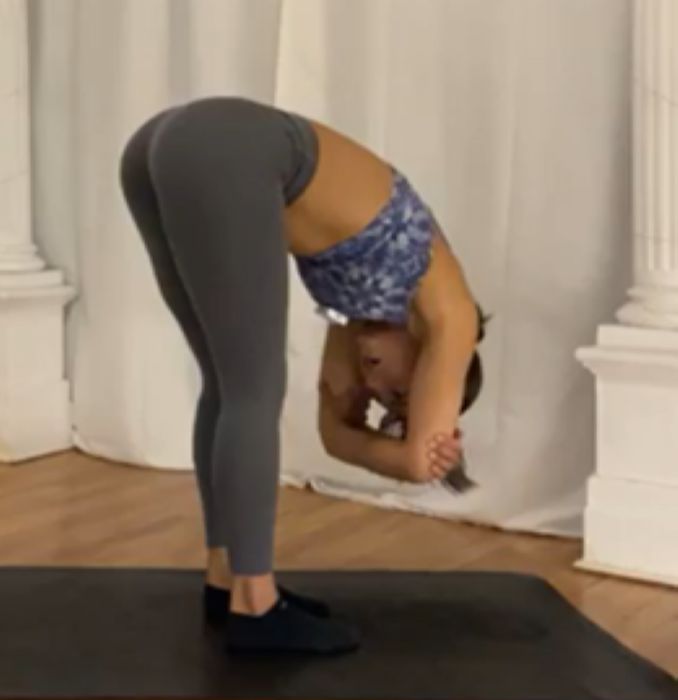
- Variation 1– Rag Doll
From the Forward Fold to Halfway Lifts position, lower your head and arms toward the floor while keeping your knees slightly bent. Cross your arms and hold your opposite elbows with your hands, slowly rocking your upper body from side to side.
 |
 |
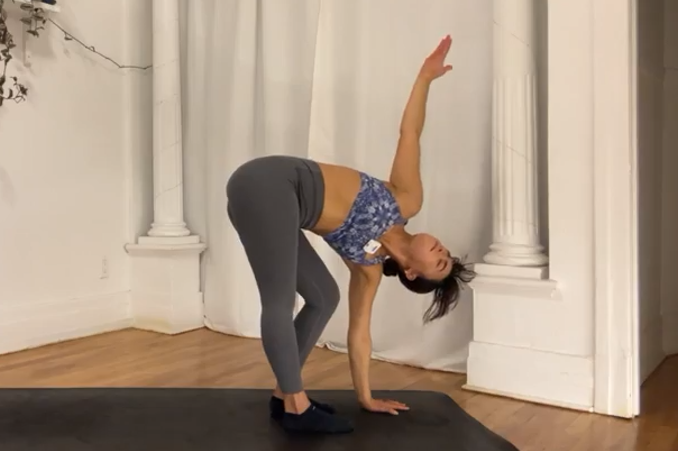
- Variation 2– Revolved Standing Forward Fold with Bent Knee
From the Rag Doll position, bend your left knee as you lower your left arm, pressing your hand to the floor for support. Engage your core. Rotate your upper body to the side and either extend the opposite arm towards the ceiling or bring your arm behind your back, keeping your right leg straight. Hold the position for several deep belly breaths, in through your nose and out through your mouth. Return to the starting position and repeat the movement on the opposite side.
To make this movement easier, place your hand on a book or a yoga block for support.
|
 |
To counter the stretch, repeat the Forward Fold to Halfway Lift.
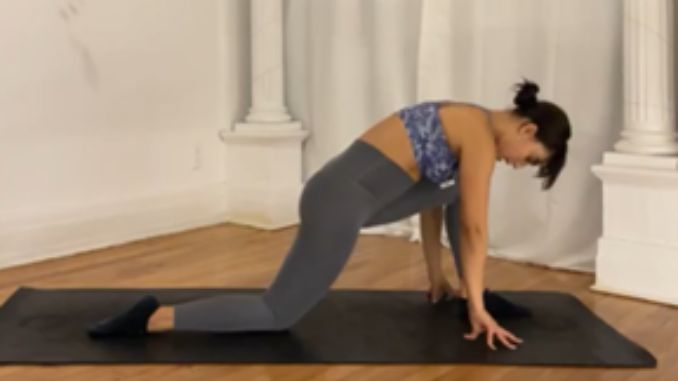
3. Lizard Lunge
Firstly, begin in Single Leg Yoga Poses a 4-point position with your hands beneath your shoulders and your knees under your hips. Secondly, take a big step forward with one foot and plant your foot on the outside of your hand to widen your hips. Thirdly, keep your toes pointing straight ahead. Afterwards, hold this position for several deep belly breaths, in through your nose and out through your mouth. Lastly, step back to the starting position and repeat the movement on the opposite side.
To make the routine more challenging, place your hands on the inside of your front foot.

-
Variation 1– Lizard Pose/Low Lunge
Firstly, begin Single Leg Yoga Poses in a 4-point position with your hands beneath your shoulders and your knees under your hips. Secondly take a big step forward with your right foot, planting your foot on the outside of your hand to widen your hips. Thirdly, lower to your forearms as you straighten your back leg with your toes tucked under your heels. Afterwards, hold the position for several deep belly breaths, in through your nose and out through your mouth. Lastly, relax and return to the starting position. Repeat the movement on the opposite side.
To make the routine more challenging, rock your body forward and back.

-
Variation 2– Lizard Pose with Twist
Firstly, begin in a 4-point position with your hands beneath your shoulders and your knees under your hips. Secondly, take a big step forward with one foot and plant your foot on the outside of your hand to widen your hips. Thirdly, keep your toes pointing straight ahead. Fourthly, bring your right hand on the inside of your right knee. Gently push your knee out as you twist your upper body to the same shoulder side, bringing your gaze up. Afterwards, hold the position for several deep belly breaths, in through your nose and out through your mouth. Lastly, relax and return to the starting position. Repeat the movement on the opposite side.
-
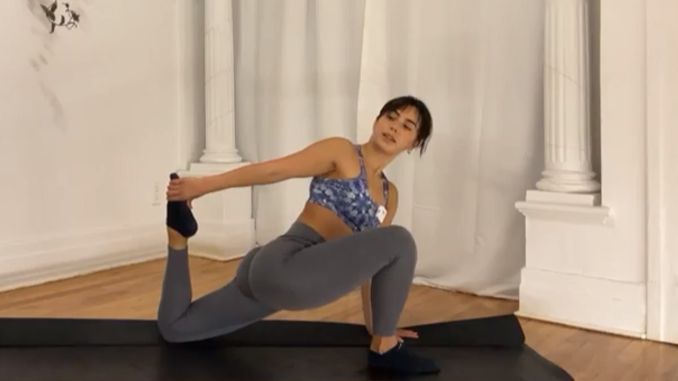
Variation 3– Lizard Pose with Quad Stretch
Firstly, begin in a 4-point position with your hands beneath your shoulders and your knees under your hips. Secondly, take a big step forward with one foot and plant your foot on the outside of your hand to widen your hips. Thirdly, keep your toes pointing straight ahead. Bend your back knee with your toes pointing toward the ceiling. Afterwards, twist your upper body to the side, grabbing your back foot with the opposite hand and bringing your gaze either behind or up towards the ceiling. Lastly, hold this position for several deep belly breaths, in through your nose and out through your mouth. Relax and return to the starting position. Repeat the movement on the opposite side.
Note: Remember to keep your lower leg, left ankle, and toes aligned to avoid strain or injury. Do not overstretch.
To counter the stretch, repeat Downward- Facing Dog to Walk the Dog.
-
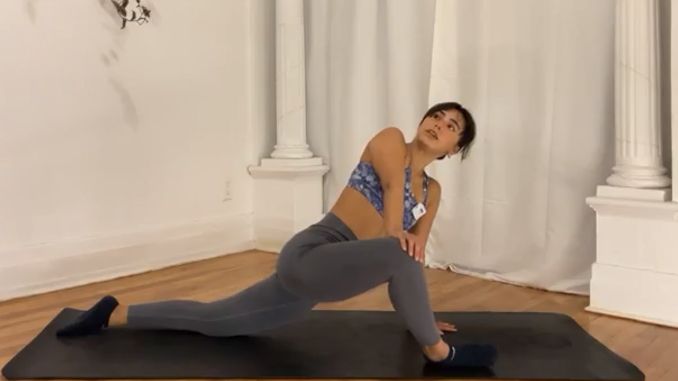
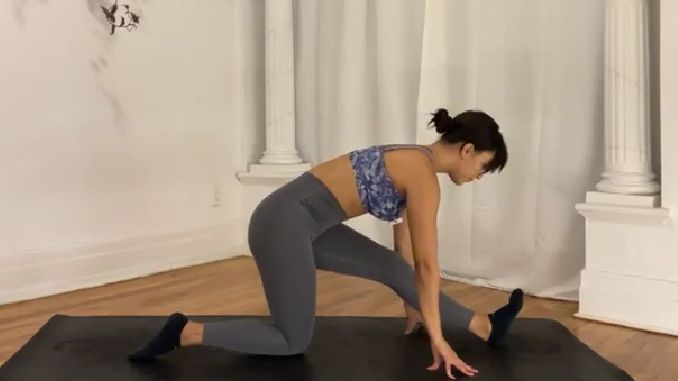
Variation 4– Lizard Pose to Half Splits
Firstly, begin in a 4-point position with your hands beneath your shoulders and your knees under your hips. Secondly, engage your core. Take a big step forward with one foot, planting your left foot between your hands and keeping your toes pointing straight ahead. Thirdly, looking for a stretch in the back of your left leg, walk your hands back as you press into your front foot, straightening your leg and flexing your toes. Afterwards, hold the position for several deep belly breaths, in through your nose and out through your mouth. Lastly, relax and return to the starting position. Repeat the movement on the opposite side.
To make the routine more challenging, rock your hips from side to side.
|
 |
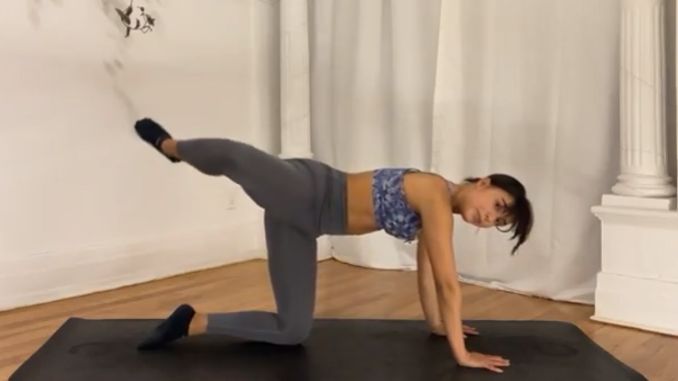
4. Fire Hydrant with Knee Circles
Begin in a 4-point position with your hands under your shoulders and your knees underneath your hips. Tighten your core and slowly lift one knee out to the side, then begin a sweeping circular motion in one direction. Lower your leg back to the starting position and repeat the movement on the opposite side. Complete 5 repetitions on each side.
 |
 |
To relax your body for a while, repeat the child’s pose.
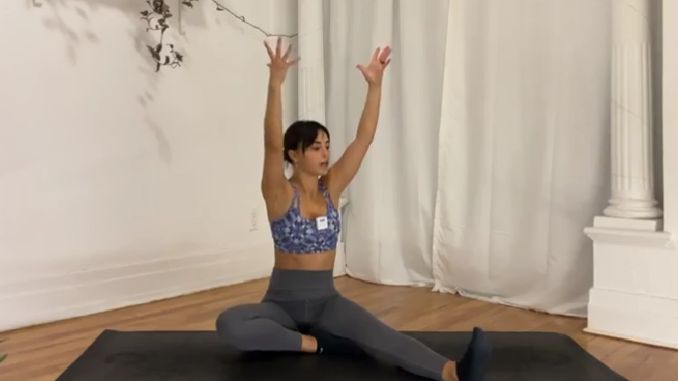
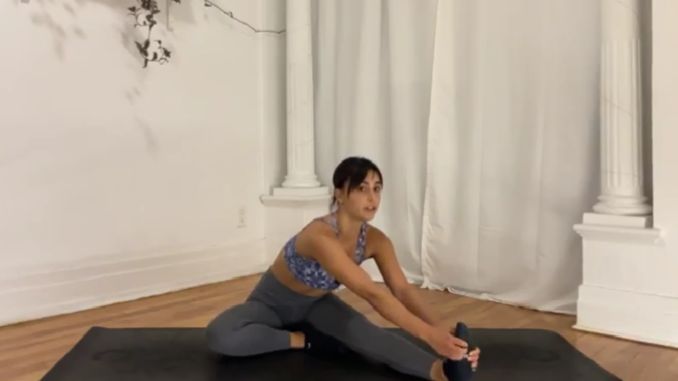
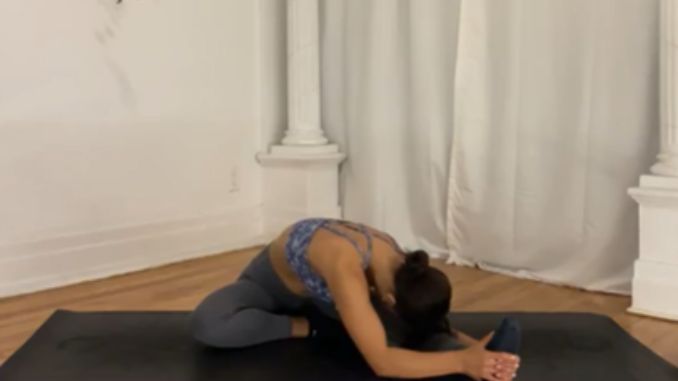
5. One-Legged Forward Fold
Begin in an upright sitting position on the floor with your legs extended in front of your body, keeping your toes pointing upward. Maintain good alignment with your head, shoulders, and hips. Bend one knee and position your foot against the inner thigh of your extended leg. Contract your core, hinge through your hips to bend your upper body forward, and reach for your toes with both hands. Depending on your comfort level, intensify the stretch by lowering your head towards your knee. Hold this position for several deep belly breaths, in through your nose and out through your mouth. Return to the starting position and repeat the movement on the opposite side.
|
 |
 |
How Single Leg Yoga Poses can Improve Flexibility and Prevent Injuries in the Legs?
1. Full Range of Motion
Yoga stretches exercise your legs in an arrangement of motions. From downward dogs to warrior poses, it covers the whole range of motion, keeping your muscles stretched and flexible. This aids in getting rid of stiffness and the improvement of overall flexibility.
2. Strength and Balance
Ever attempted the tree pose in yoga? It goes beyond mere bending, focusing on building strength balance and equilibrium, which are crucial for stabilizing muscles, reducing sprain risks, and improving the overall function of the standing leg when balancing on one leg.
3. Injury Prevention
Yoga is similar to an athlete's training regimen for injury avoidance. The various poses target various muscular areas, increasing their resilience. This can aid in preventing common injuries by improving muscle flexibility and joint health.
4. Mind-Body Harmony
Yoga is more than a physical full-body workout; it is also a mental one. The focus on breath and awareness helps to connect your mind and body. This sensitivity lets you detect tight places or discomfort early on, avoiding injuries.
Takeaways
In our daily lives, where our legs carry the weight of our everyday activities, giving them the attention and care they need through yoga is important. So, whether you want to improve your deep flexibility, leg muscles, strength, improve balance, or injury resistance, let yoga be your trusty partner. It is more than simply a workout; it is a path toward a healthier, happy leg that will support you throughout your life.
Introducing the 10 Yoga Poses to Make Your Body Fall-Proof - poses that will help you become more stable, reduce your risk of fall injuries, and make daily activities easier.
