8 Effective Stretches — How To Loosen Tight Muscles in Legs
Medical Disclaimer: The information in this blog is for enlightening and educational purposes only and is not intended as medical advice. The content in this post is not meant to substitute for a professional medical diagnosis, advice, or treatment. Always ask advice from your physician or other qualified health providers with any questions you may have regarding a medical condition.
Ever had your legs feel tight or cramped up all of a sudden? I’ve been there... it’s no fun! That’s why learning how to loosen tight muscles in legs can make such a difference!
Stiff, achy muscles can throw off your day, but the good news is, that finding relief is easier than you might think.
Whether a cramp surprises you or ongoing tightness makes every step harder, there are simple ways to loosen those muscles and feel great again.
In this post, I’m sharing eight easy stretches that have worked wonders for me... and they can do the same for you. These stretches will help relax your muscles, boost your flexibility, and also get you moving with ease.
Key Benefits for Different Audiences
-
Seniors: Gentle movements like Deer Pose and Child’s Pose are your secret weapons. They help improve your balance, reduce the risk of falls, and ease tension in your lower back and hips. Small steps today can make a huge difference in feeling steady on your feet tomorrow.
-
Athletes: Ever wonder how top athletes like LeBron James stay at the top of their game? They stretch! Hero Pose and Lizard Lunge aren’t just for yogis—they keep muscles flexible, reduce the chance of injury, and help you recover faster to keep pushing your limits.
-
Pregnant: Pregnancy can be hard on the hips! That’s where the Bound Angle Pose and Windshield Wiper come in. These poses gently release hip tension which will help you feel more comfortable now and during childbirth. (Just a friendly reminder: Always check in with your doctor before starting new exercises.)
-
Individuals with Sedentary Life: Sitting for hours on end can tighten your hips and stiffen your back—ouch.
The good news? Poses like Seated Spinal Twist and Walk the Dog can help counteract all that desk time. They’ll loosen stiff muscles, improve posture, and also relieve back pain.
Stretches to Relieve Tight Calf Muscles
Incorporating daily leg stretches into my routine has greatly helped in relieving tightness in my calf muscles.
Here are some simple yet effective stretches I use to keep my legs relaxed and flexible.
Watch this video for guidance: Gentle Stretching - Facebook Live, or follow these steps: If you're starting yoga with tight legs, rest assured—many people experience the same challenge!
Laura Finch, MS, PT, YTT, an expert in the field of yoga, gets it... she’s been there.
"Day 1: I could barely touch my toes," she admits. If your legs feel stiff like that too, it's completely normal. It will get better if you stick with it.
"At first, I could barely touch my toes. But I didn’t give up," Laura adds. Slowly but surely, things started to change.
The same can happen to you. Just keep showing up.
8 Yoga to Loosen Tight Muscles in Legs
For the following poses, you can utilize yoga blocks, mat, or pillow for support
Warm Up
a. Windshield Wiper

- Begin in an upright sitting position on the floor with your knees bent and your feet flat on the floor, while maintaining good alignment in your upper body.
- Place your hands on the floor behind you for support.
- Engage your core and then lower both knees to one side.
- Repeat the movement in the opposite direction.
b. Bound Angle Pose

- From the Windshield Wiper position, bring the soles of your feet together and open your knees out to the sides.
- Grab the outer edges or the big toes of your feet and take a deep belly breath.
- Engage your core.
- Exhale and hinge through your hips to bend your upper body forward.
- Hold this position for several deep belly breaths, in through your nose and then out through your mouth.
- Relax and return to the starting position.
- Repeat the movement.
To intensify the stretch to loosen tight muscles in legs, swing your head from side to side.
c. Dynamic Baddha Konasana

- From the bound angle pose, return to an upright sitting position and bring your hands behind your back for support.
- Widen your stance by dropping your knees out to the sides while maintaining a straight spine and engaged core.
- Gently move your knees up and down like the wings of a butterfly.
- Continue the movement at your own comfortable pace until you feel it's time to stop.
d. Foot Circles

- From the Dynamic Baddha Konasana position, extend your legs forward, keeping your spine straight, and relax your shoulders.
- Press your heels into the floor, keeping them firmly in place, and start making circles with the ball of your foot.
- Do this in both directions, clockwise and counterclockwise, ensuring an equal number of rotations each way.
- Repeat the movement with the opposite foot.
To intensify the movement to loosen tight muscles in legs, lift your foot off the ground, creating circles in the air.
Routines to Loosen Tight Muscles in Legs
1. Hero Pose Knee Raise

- Begin in an upright kneeling position, while maintaining good alignment with your head, shoulders, and hips.
- Shift your hips back to rest your seat on your feet.
- Depending on your comfort level, progress the movement by placing your hands behind you for support.
- Engage your core.
- Lean back and slowly lift your knees off the floor.
- Hold the position for a couple of seconds.
- Relax and then lower your knees to return to the starting position.
- To make the movement easier, lift your knees one at a time.
- To intensify the stretch to loosen tight muscles in legs, lift both knees toward your chest; move your chest closer to your knees by lifting your seat off the floor.
This pose stretches your thighs and strengthens your knees, improving flexibility and balance. It’s especially good for athletes to prevent injuries, and focused breathing helps clear the mind and reduce stress.
Variation 1 - Toe Squat

- For this stretch to loosen tight muscles in legs, begin in an upright kneeling position on the floor with your knees closed together, while maintaining good alignment with your upper body.
- Engage your core, tuck your toes, then shift your hips back to your feet as you place your hands on your thighs while keeping your spine straight.
- Hold the position for several deep belly breaths through your nose and then out through your mouth.
- To come out of the pose, lean forward and gently untuck your toes, returning to a kneeling position.
If this pose is challenging, perform a counter exercise by dropping your hands down, coming into a 4-point position, tapping your toes, and then returning to the Toe Squat.
Depending on your comfort level, repeat Foot Circles.
Did you know that Lebron James, who once neglected these practices, now includes yoga, specifically the Hero Pose, in his training routine to stay flexible, prevent injuries, and boost both his physical and mental performance?
He credits yoga with improving his balance and focus, which has helped him avoid serious injuries and extend his basketball career.
2. Deer Pose

- Begin in an upright sitting position on the floor with your legs crossed, while maintaining good alignment with your upper body.
- Bring your right foot near your right sitting bone and then place your left shin parallel to the floor, creating a 90-degree angle with your thigh and calf.
- Engage your core.
- Tuck your tailbone and lengthen your spine as you bring your hands toward the back, allowing your head to fall.
- Hold the position for several deep belly breaths, in through your nose and then out through your mouth.
- Relax and then return to the starting position, change the position of your legs, and repeat the movement.
To make the exercise easier, stay in an upright sitting position and place your hands on your thighs.
To intensify the stretch, lean back onto your forearms or down to the floor, depending on your comfort level. Place your hands on your sides, grab your elbows overhead, or reach down with your hands and hold onto your feet, then gently press the soles together, applying as much pressure as feels good to you. Hold the position for 5 deep belly breaths.
3. Seated Spinal Twist

- Begin in an upright sitting position on the floor with your knees bent and feet flat on the floor.
- While maintaining good alignment with your upper body.
- Bend your left knee out to the side, and place your right foot over your bent knee.
- Wrap your arms around your right knee to hold it closer to your chest.
- Engage your core and then twist your upper body to the right side, gazing over your right shoulder while keeping your spine straight.
- Hold the position for a couple of seconds, then release your arms and move your upper body to the left side, dropping your hands down as you slightly lower your upper body towards the floor with your head down.
- Relax and then return to the starting position. Repeat the movement on the opposite side.
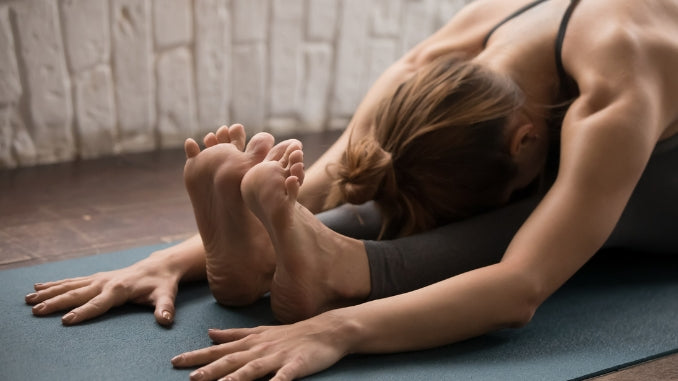
4. Child’s Pose

- Begin in a 4-point position with your hands beneath your shoulders and your knees under your hips.
- Engage your core.
- Shift your hips back to your feet and extend your arms in front.
- Drop your forehead on the floor, relaxing your mid-back area for a light stretch.
- Hold this position for 5 deep belly breaths, in through your nose and then out through your mouth.
5. Hero Pose Eagle Arms

- Begin in an upright kneeling position on the floor, while maintaining good alignment with your head, shoulders, and hips.
- Shift your hips back to rest your seat on your feet.
- Engage your core and cross your arms in front of your body at shoulder height, wrapping at the elbows and wrists.
- Inhale, allow your head to fall back to bring your arms overhead, then exhale, round out your mid back as you slowly drop your head toward the floor.
- Relax and return to the starting position.
- Repeat the movement on the opposite side.
- Start with 1 set of 5 repetitions.
To make the exercise to loosen tight muscles in legs easier, cross your arms in front of your body, just where the back of your palms meet.
6. Lizard Lunge

- Begin in a 4-point position, with your knees below your hips and your hands beneath your shoulders.
- Bend one knee forward, planting your foot on the outside edge of your hand to widen your hips.
- Engage your core and palms pressed firmly on the floor with arms straight, or place your hands on your bent knee while keeping your toes pointing straight ahead.
- Bring your forearms down to the floor with your head facing down.
- Hold this position for several deep belly breaths, in through your nose and then out through your mouth.
- Relax and repeat the movement on the opposite side.
To make this pose easier, stay in a position with your arms straight or rest your hands on yoga blocks while keeping your spine straight.
Also, to intensify the pose to loosen tight muscles in legs, extend your arms forward.
7. Twisted Lizard

- Move to a low lunge position with your hands on your sides and your right leg extended to the back.
- While maintaining good alignment with your upper body.
- Engage your core.
- Firmly press your right hand on the floor for support.
- Push your left knee with your left hand, then twist your upper body, looking toward the sky.
- Hold in this position for a few breaths, letting the stretch open your hips.
- Relax and then return to the starting position.
- Repeat on the opposite side.
- You can rest your hands on the blocks if it feels more comfortable.
Variation 1 - Lizard Pose Variation Quad Stretch

- From the Twisted Lizard pose, bend your back foot up with your toes pointing towards the ceiling.
- Grab your foot with your left hand, pushing your foot toward your hips while keeping your gaze towards the floor, looking for a light stretch.
- Hold this position for several deep belly breaths, in through your nose and then out through your mouth.
- Relax and repeat the movement on the opposite side.
If grabbing your foot feels challenging, simply bend your back foot with your toes pointing toward the ceiling, extending your hands forward to maintain a comfortable stretch.
Variation 2 - Lizard Pose to Half Splits

- Straighten your right leg and place your hands on the side of your bent knee for support.
- Engage your core and push your hips back to straighten your left leg, toes pointing up towards the ceiling, lengthening your spine.
- Hold this position for several deep belly breaths, in through your nose and then out through your mouth.
- Relax and return to the starting position.
- Repeat the movement on the opposite side.
- Start with 1 set of 3 repetitions.
Also, to intensify the movement at the end position, rock your hips from side to side or extend your arms forward.
Tip: Bend the leading knee to prevent curling your spine.
Variation 3 - Cobra Pose

- For this stretch to loosen tight muscles in legs, lie on your stomach on the floor with your legs extended, while maintaining good alignment with your head, shoulders, hips, and legs.
- Place your hands on the side of your chest with your elbows bent.
- Contract your abdominal muscles and slightly lift your mid-back off the floor using your hands as support.
- Hold this position for several deep belly breaths, in through your nose and then out through your mouth.
You can prefer to perform Upward-Facing Dog in place of Cobra Pose with these steps:
Variation 4 - Upward-Facing Dog

- Move into a straight-arm plank position, while maintaining good alignment with your head, shoulders, hips, and toes.
- Engage your core.
- Lower your hips to the ground, arching through your back to stretch the hips and lower back area.
- Hold this position for several deep belly breaths, in through your and then out through your mouth.
Moreover, depending on your comfort level, repeat child pose.
8. Walk the Dog

- For this stretch to loosen tight muscle in legs, begin in a 4-point position with your hands beneath your shoulders and your knees under your hips.
- Engage your core and then tuck your toes as you push back with your arms, straightening your legs as you lift your hips.
- Bend one knee to lift your heel off the floor while keeping your other leg straight.
- Lower your heel back down and alternately repeat the movement on each side with 5 repetitions.
Cool Downs
a. Supine Figure 4 Twist

- Lie on your back with your knees bent and your feet flat on the floor.
- Engage your core and then cross one ankle over your knee.
- Depending on your comfort level, wrap your arms around your lower leg with both hands and gently pull your knee closer to your chest to intensify the stretch.
- As you feel comfortable, progress the movement by twisting through the lower back, pelvis, and spine to bring your legs to one side.
- Place one hand on your leading leg for support while extending your other arm on the opposite side.
- Hold this position for several deep belly breaths, in through your nose and out through your mouth.
- Relax and then repeat the movement on the opposite side.
To make the stretch to loosen tight muscles in legs easier, stay in the position where your foot is planted on the floor.
b. Savasana

- Lie on your back on the floor with your feet wider than shoulder-width apart, maintaining good alignment in your upper body.
- Place one hand on your belly and the other hand on your chest.
- Close your eyes and take several deep belly breaths, in through your nose and then out through your mouth, relaxing your entire body.
To gently reawaken your body and bring awareness back to your physical self after deep relaxation, wiggle your toes and fingers, or move your head from side to side.
c. Full Body Stretch

- Lie on your back on the floor, while maintaining good alignment with your head, shoulders, hips, and legs.
- Engage your core and then reach your arms overhead as you stretch your legs long.
- Hold this position for several deep belly breaths, in through your nose and then out through your mouth.
d. Lotus /Prayer Pose

- Begin in an upright sitting position with your legs crossed in front of your body, while maintaining good alignment with your head, shoulders, and hips.
- Bring your left ankle over the top of your right shin by your hip crease.
- Press your palms together in a prayer position at chest height.
- Close your eyes and hold the position for several deep belly breaths, in through your nose and then out through your mouth.
Yoga works wonders for tight muscles! Megan Monte, with insights from Micky Lal, MA, CSCS, RYT, shares on Medical News Today that yoga makes muscles more flexible and less stiff. It helps your body move and function better.
If you’re feeling sore, stressed, or tight, yoga might be the answer. So, practicing yoga regularly, with proper guidance, not only alleviates tension but also prevents muscles from tightening again.
Doesn’t that sound like a great way to feel lighter and more relaxed?
Flexibility Assessments

To track your progress and see how far you've come, try the following flexibility tests:
Test 1: Calf Flexibility Assessment
Test Name: Wall Calf Stretch Test
Procedure:
- Stand facing a wall, place one foot behind the other, with the back leg straight and heel on the ground (wall calf stretch position).
- Slowly lean forward, keeping the back leg straight and the heel on the ground, until a stretch is felt in the calf.
- Measure the distance between the toes of the back foot and the wall (in cm or inches).
Scoring:
- 0 points: Less than 5 cm distance. This point would suggest tightness in the calf muscles, which is significantly below the averages reported in the study. This range indicates below-average flexibility, where the calf muscles and Achilles tendon are relatively tight.
- 1 point: 5-10 cm distance. This is a moderate level of flexibility, common for most individuals, indicating a potential area for improvement.
- 2 points: More than 10 cm distance [¹]. This reflects above-average flexibility, where the calf muscles and Achilles tendon can elongate more without discomfort.
↪Track improvement by reassessing every 2 weeks to see if someone's flexibility is improving. If the distance increases over time, it would indicate that their calf muscles are becoming more flexible.
Test 2: Hamstring Flexibility Assessment
Test Name: Standing Hamstring Stretch Test
Procedure:
- Stand with your feet together and legs straight.
- Slowly bend forward, reaching toward the toes while keeping the legs straight.
- Measure the distance between the fingertips and the ground.
Scoring:
- 0 points: If you can't reach your toes, it suggests your hamstrings are tight, meaning your flexibility is below average.
- 1 point: If your fingertips touch your toes, it indicates moderate flexibility, which is common for most people.
- 2 points: If you can place your palms flat on the ground, it shows excellent flexibility, which is above average.
↪Track improvement every 2 weeks. If you practice and improve, you might see your score move from 0 points to 1 or 2 points, indicating better flexibility.
As your flexibility improves, there could also be some improvement in your muscle strength balance, but remember that while flexibility and strength are somewhat connected, they are not directly proportional.
Test 3: Range of Motion Test
Test Name: Seated Calf Stretch with Resistance Band
Procedure:
- Sit on the floor with your legs extended.
- Loop a resistance band around the ball of one foot, keeping the leg straight, and gently pull the band to stretch the calf.
- Measure the ankle dorsiflexion angle (how far the toes can point toward the shin).
Scoring:
The scoring in the Seated Calf Stretch test gives a more practical assessment of flexibility, correlating with the angles measured in the Goniometry test [²]
- 0 Points (Less than 10 degrees) - This corresponds to a limited range of motion. It indicates that your ankle dorsiflexion is below the normal range, which could be due to tight calf muscles, higher body fat, a sedentary lifestyle, or previous injuries. This would mean your dorsiflexion angle is less than 10 degrees, even with a straight leg.
- 1 Point (10–20 degrees) - This indicates a moderate range of motion, which is typical for most people, especially in middle age. It suggests some flexibility, but there might still be some tightness in the calf muscles. This matches the expected range of motion, with the knee straight (10 degrees) or bent (20 degrees).
- 2 Points (More than 20 degrees - This score reflects above-average flexibility, showing that you have a greater range of dorsiflexion. It indicates well-conditioned calf muscles and no significant restrictions in the ankle joint. This would mean your dorsiflexion angle exceeds 20 degrees, indicating a high level of flexibility.
↪Track improvement by reassessing monthly.
Test 4: General Leg Muscle Flexibility Test
Test Name: Yoga Pose Assessment (Downward Dog)
Procedure:
- Perform the Downward Dog yoga pose, focusing on straightening the legs and pressing the heels toward the ground.
- Assess and note the angle at the knee and the distance between the heels and the ground.
Scoring:
- 0 points: Knees bent significantly, heels far from the ground. This position indicates significant inflexibility in the legs, particularly in the hamstrings and calves.
- 1 point: Knees slightly bent, heels close to the ground. This position shows moderate flexibility, which is also functional but not optimal.
- 2 points: Straight legs, heels touching the ground. This position reflects high flexibility, especially in the hamstrings and calves.
↪Track improvement every 2 weeks.
Test 5: Muscle Tension and Stiffness Evaluation
Test Name: Muscle Stiffness Rating [³]
Procedure:
- After completing a series of calf stretches, rate the stiffness or muscle tension felt in the calf muscles using a scale of 1–10.
Scoring:
- 0 points (Stiffness rating of 10) - Extreme stiffness after stretching indicates poor flexibility, warranting a 0-point score. Your muscles might not be working well, and stretching or exercise might not help much. Your muscles could feel very tense.
- 1 point (Stiffness rating of 5–9) - This level of stiffness is moderate, suggesting some muscle tension but not severe. This means your muscles are starting to get more flexible but still have some tension. With regular stretching or exercise, this stiffness might improve.
- 2 points (Stiffness rating of 1–4) - Minimal stiffness indicates that the muscles are quite flexible and relaxed. It only means that your muscles are in good shape, with very little tension after stretching. This is the best condition for your muscles to be in.
↪Track improvement by reassessing weekly.
Tracking your progress can help you stay motivated. If you want more tools to log your stretches and see your improvement over time, visit Exercises for Injuries for helpful resources.
Conclusion
Tight leg muscles don’t have to get in the way. These stretches help me stay flexible, ease tension, and feel good. I hold each stretch for about 30 seconds, moving slowly and comfortably—no need to push through pain.
It’s about smooth, controlled movements, not speed.
These simple stretches make a real difference. By staying consistent and consulting a physical therapist, you'll keep feeling more relaxed, comfortable, and ready to enjoy life!
Free yourself from the gnawing fear of falling! Try the 10 Yoga Poses to Make Your Body Fall-Proof and see what a big difference fall-proof yoga poses can make in your everyday life. Own your movements and your active life back!

1. Gohil, R., & Tilaye, P. (2022). Normative Data for Calf Muscle Flexibility Tested by Weight Bearing Lunge Test in Age Group of 20-30 Years - Pilot Study. International Journal of Health Sciences and Research, 12(2), 71–75. https://doi.org/10.52403/ijhsr.20220209
2. Goniometry: Ankle (Talocrural) Dorsiflexion. (2016). Physiopedia. https://www.physio-pedia.com/Goniometry:_Ankle_%28Talocrural%29_Dorsiflexion
3. Ramírez-delaCruz, M., Bravo-Sánchez, A., Esteban-García, P., Jiménez, F., & Abián-Vicén, J. (2022). Effects of Plyometric Training on Lower Body Muscle Architecture, Tendon Structure, Stiffness and Physical Performance: A Systematic Review and Meta-analysis. Sports Medicine - Open, 8(1). https://doi.org/10.1186/s40798-022-00431-0